Table of contents
- TL;DR
- Prerequisites
- Step 1: Freeze the design and gate the build
- Step 2: Qualify incoming materials
- Step 3: Stamp the RV water heater sheet metal parts on progressive dies
- Step 4: Form the inner and outer shells on the robotic sheet metal cell
- Step 5: Roll the tank body and fit the end caps before the weld station
- Step 6: Weld and verify tank joints and fittings
- Step 7: Apply anti-corrosion glass-lining and fire the tank finish
- Step 8: Vacuum-braze the compact heat-exchanger stack
- Step 9: Run the electric RV water heater control board through the SMT line
- Step 10: Install the gas valves, burners, igniters, sensors, and wire harnesses
- Step 11: Marry up the tank, shell, brackets, and anti-rattle hardware
- Step 12: Run final testing and sign the release gate
- Common failure modes and the controls that catch them
- Final thoughts
- Frequently asked questions about the RV water heater manufacturing process
A note on the walk. The stages, thresholds and test logic below come from Gulfstone’s own Foshan line, our lead engineer’s interview and our internal QA records — not from a cross-brand comparison. Read them as one factory’s method, evidenced.
TL;DR
- The RV water heater manufacturing process starts with a frozen drawing and ends with a signed shipment release.
- Tank-style and tankless units share four early stages before splitting at the pressure vessel.
- Step 12 runs 100% inline pressure, leak, gas-leak, ignition, thermostat, hi-pot and flow checks.
- Vacuum brazing joins tankless heat exchangers; welding suits low-volume tanks but distorts thin plates.
This guide is for procurement and engineering leads, not consumers. It is advanced, factory-floor level. If you want to fix a pilot light, stop reading.

Gulfstone’s Lead Manufacturing Engineer Beck Zheng walked me through the 12-stage compact heater line. That walk produced a structured interview, internal QA destructive test logs, and a planned image set. Tank-style and tankless units share four early stages. They split at the pressure vessel.
Why this matters for OEM buyers: line repeatability, compliance exposure, warranty risk, and dimensional fit inside a tight RV envelope. A 2mm tolerance slip at stage four halts your assembly line.
Every step below ends with a verification lens. This prerequisite section covers the factory document pack and safety gates before Step 1.
Prerequisites
An RV water heater diagram is a manufacturing-reading tool: a controlled engineering drawing of how the tank, burner, and controls assemble on our line. It is not an end-user installation sketch.
This section relies on Gulfstone’s controlled factory documents, not internet norms. Every threshold later comes from our internal records. Plant details follow Gulfstone’s factory capabilities documentation.
Document pack (before Step 1):
- Approved BOM, 2D/3D drawings, OEM drawing package
- CTQ dimensions, control plan, PFMEA
- Weld procedure, glass-lining spec, vacuum-brazing recipe
- PCBA test plan and packaging spec
Access and time:
- Manufacturing engineering and QA lab access
- Line photography permission
- A booked Lead Manufacturing Engineer interview
Official reference stack: ANSI Z21.10.3 / CSA 4.3, RV platform safety expectations, and ISO 9001 work instructions.
Safety gates:
- Lockout-tagout around furnaces and welding cells
- Pressure-test shielding and gas-leak controls
- Hi-pot test precautions
Visual asset: Prepare one line or value-stream diagram. Describe the visual cue in text for screen readers and colorblind readers, not color alone.
⚠️ Safety First: Never photograph lines during active gas-leak testing. I have watched teams lose a full shift to that mistake.
Who makes RV water heaters? The answer starts with architecture, not branding. In our Foshan plant, compact lines split across tank-style, tankless, gas-only, and gas-electric builds, and each drives different tooling.
We cut tank-style first: the welded vessel dictates the welding method, glass-lining recipe, control-board layout, and leak-test protocol. A tankless switch rewrites all of it.
Step 1: Freeze the design and gate the build
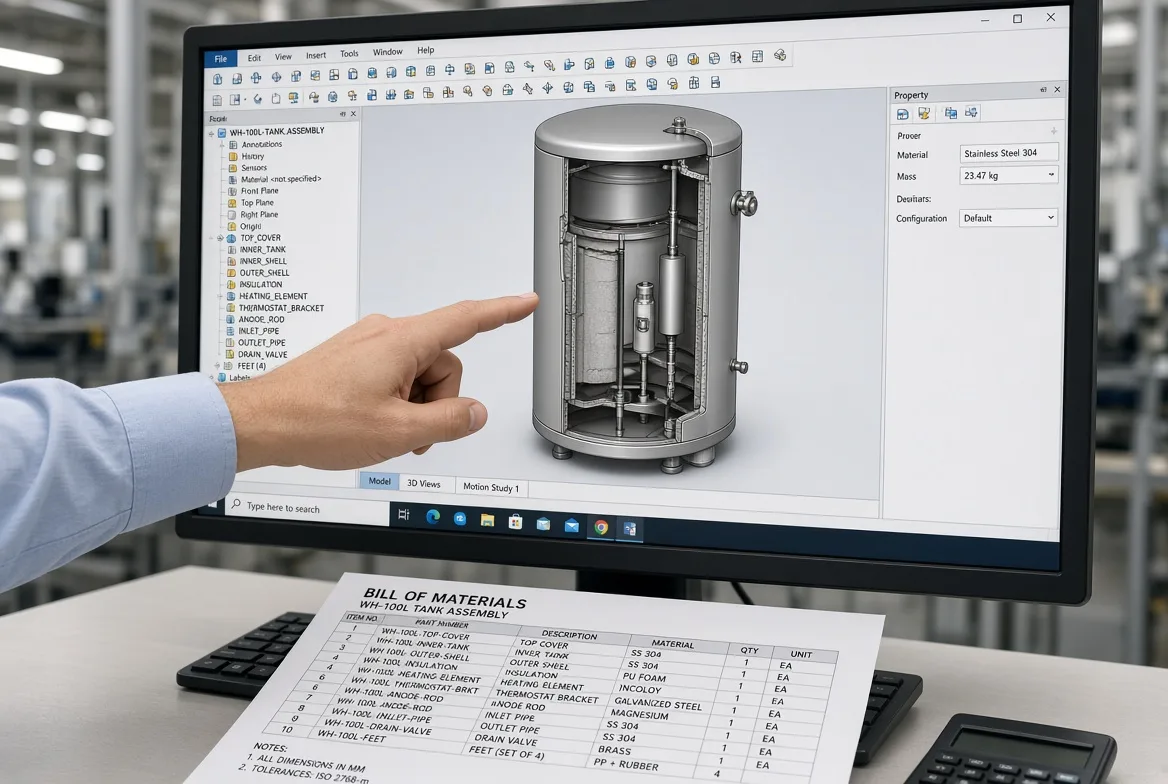
Freeze these variables now: capacity, heat input, voltage, enclosure footprint, service clearance, certification market, and OEM branding needs.
Last quarter, our lead Beck Zheng tapped a marker on the whiteboard: “One architecture choice ripples through the whole plant. Switch to tankless after freeze, and you scrap the fixture and retrain two shifts.”
Your gate: an approved BOM and a signed design-freeze package.
⚠️ Experience Warning: I have seen a team skip this freeze and lose six weeks re-certifying to ANSI Z21.10.3. Commit before you cut metal.
Step 2: Qualify incoming materials
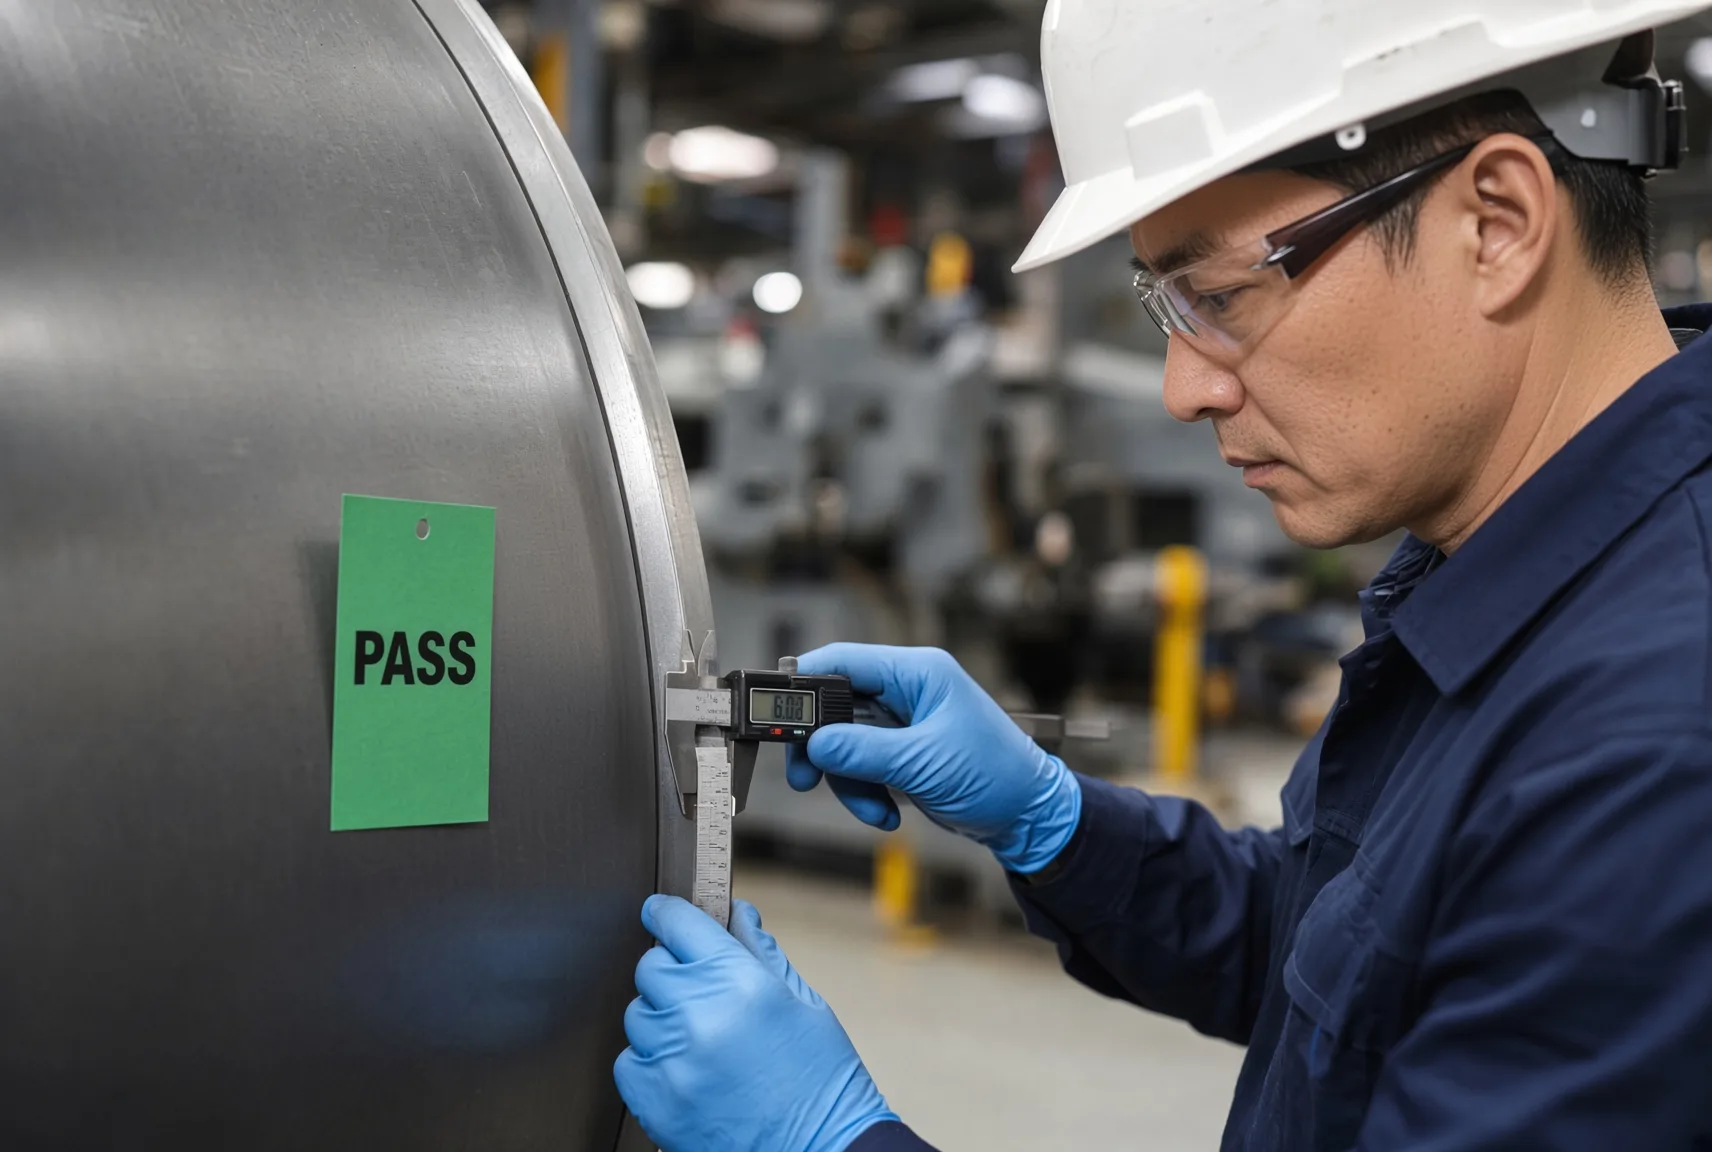
Incoming material qualification ends with one decision per lot: release, quarantine, or reject.
No steel coil, stainless exchanger set, burner part, gas valve, sensor, insulation lot, or SMT reel touches a fixture until IQC releases it. This is RV heater production, not a generic supplier audit.
Check COAs, steel thickness, flatness, coating condition, moisture protection, terminal integrity, and certification paperwork. SMT reels get a first-article run first. Imported parts must match the compliance packet exactly, or the finished unit is unsellable in regulated markets.
🔬 Sensory Check: Acceptable coil feels dry, flat, oil-faint. Suspect stock shows dark oil streaks, edge burrs, or dented flanges. Run your thumb along a flange edge: a burr catches skin and fails the lot.
QA tags each quarantined lot and logs the coil or reel ID into the traceability system. Operators who spot a burr walk it to the quarantine cage.
Verify a signed lot-release card, written quarantine criteria, and the traceability handoff to production. RV parts must survive vibration, temperature swings, and tight installation envelopes.
🧠 Expert Take: I reject more lots for coating damage than dimensional error. Salt-spray data beats a pretty COA.
Step 3: Stamp the RV water heater sheet metal parts on progressive dies
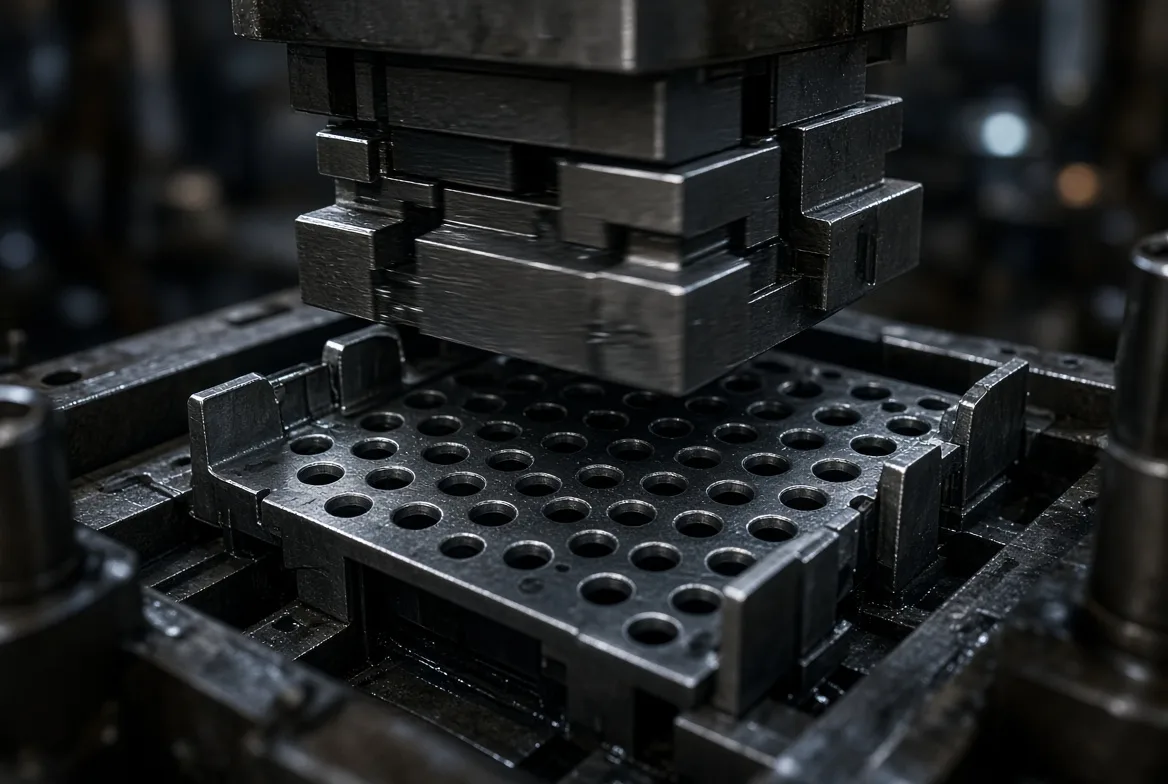
Progressive stamping dies turn coiled steel into repeatable RV water heater parts: burner plates, brackets, flanges, vent parts, and enclosure reinforcements.
In our Foshan plant, I listen to the press cadence. A steady beat means healthy tooling. A labored cycle means worn tooling. Slugs evacuate with a sharp ping; a dull thud leaves taller burrs.
The strip layout feeds left to right: pilots locate, then pierce, bend, and coin. In-die forming removes secondary operations.
Procurement cares because progressive dies cut variation and stabilize cost at volume. Verify burr height, hole position, flatness, and fixture fit against your CTQ drawing tolerances.
⚠️ Experience Warning: A burr height drift once halted an RV assembly line. Check burrs every few hundred strokes.
Step 4: Form the inner and outer shells on the robotic sheet metal cell
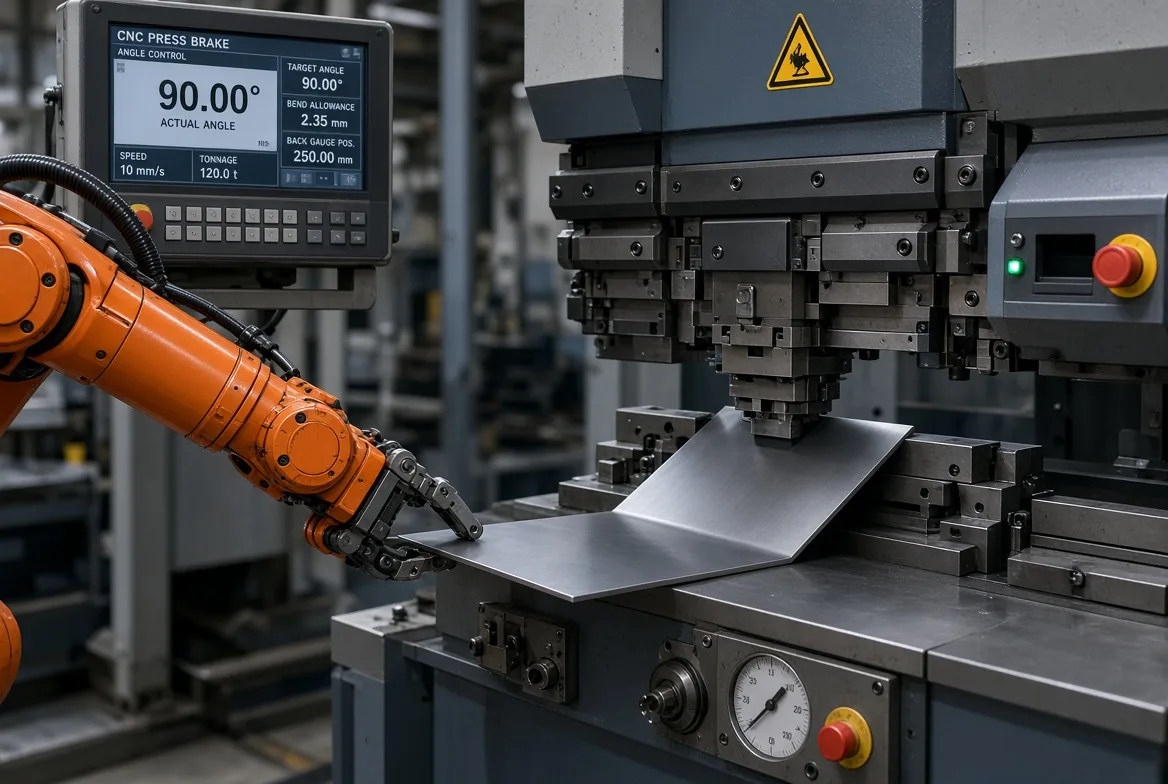
How are the inner and outer shells of water heaters manufactured? On our line: nested blanking, precision cutting, bending, and fit-up for RV heater casings, not generic appliance sheet metal.
Robotic sheet metal drives the main flow. A fiber-laser or punch blanker cuts nested panels, a robotic press brake bends each one, and panel ID control tracks every shell. Manual brake work only covers low-volume runs: slower, operator-dependent, kept off the main line.
Sensory check: a clean laser edge sounds crisp and feels smooth. Springback reads as a soft return after the ram lifts; a true bend leaves no witness marks.
Our numbers: nesting yield 87%, cycle time 42 seconds per shell, bend-angle tolerance ±0.5°, changeover about 18 minutes on the panel-ID recipe.
RV casings beat home-appliance sheet metal for difficulty: tighter space claims, exterior weather exposure, rattle risk. Verify bend angle, panel squareness, fixture fit, and door-gap consistency.
⚠️ Experience Warning: One manual cell skipped a springback check. Angle drifted past ±1.5°, door fit-up failed, and we scrapped the run.
Step 5: Roll the tank body and fit the end caps before the weld station
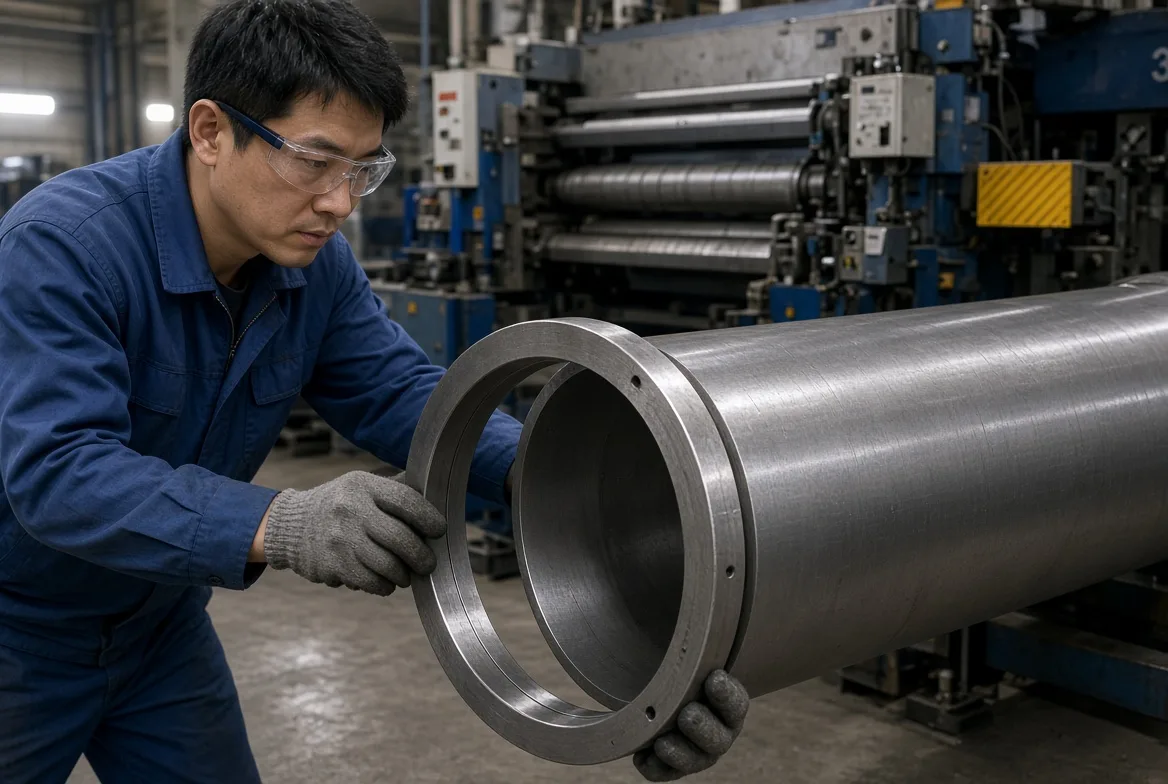
Our pre-weld work on tank-style logic starts here: roll the shell, form the ends, prep the ports. I watched it run in our Foshan plant last month.
A 3-roll bender rounds the steel cylinder. An end-cap press coins the domed heads with the spud boss. Operators punch and deburr the flange ports before any tack weld.
Tankless builds split off here. Compact-core units skip the rolled shell for a flat-plate heat-exchanger stack.
🔬 Sensory Check: Run your palm along the seam. A good roll feels flush. A bad one catches your fingernail. Cup the open end: roundness should match at 3 and 9 o’clock.
Operators gate each unit with go/no-go ring gauges on shell OD and concentricity dial gauges on the end-cap spud. A tack-fit gauge confirms flange alignment.
Verify no seam mismatch, a clean fixture pass, and port alignment to the assembly datum. Bad fit-up here drives rework, weak welds, and chassis interference.
⚠️ Experience Warning: One off-tolerance shell stopped our weld cell for two days and forced rework on 60 units.
Step 6: Weld and verify tank joints and fittings
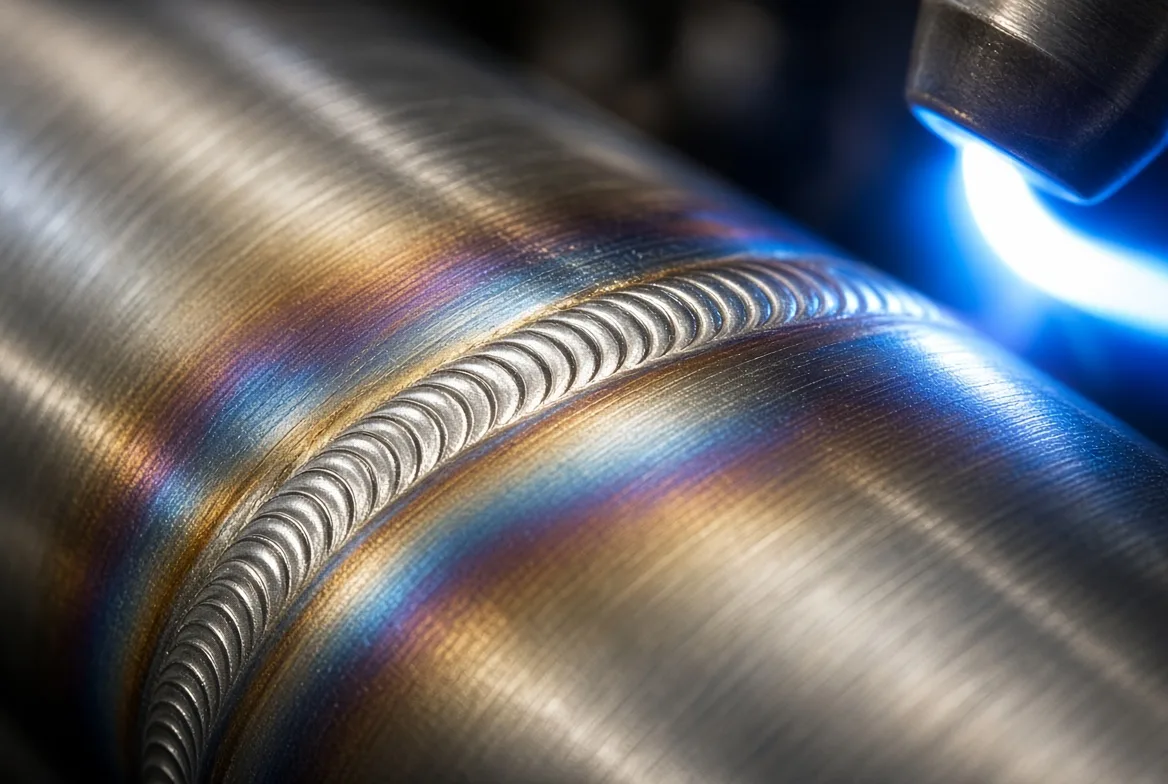
Leak prevention begins at the weld fixture, not the final test. A loose fixture only pushes the catch downstream.
Robotic seam welding runs the RV heater tank body; manual covers low-volume runs. TIG and plasma handle stainless, MIG covers brackets, and projection welding attaches fittings.
⚠️ Process note: Gulfstone’s controlled WPS lists exact visual criteria, porosity limits, penetration, first-pass leak acceptance, and rework triggers; we publish approved numbers, never generic values.
🔬 Sensory Check: I listen for a steady hiss and a silver-blue bead. Gray means heat-input drift.
Last quarter, a pinhole leak hit 3 of 200 drain fittings. Our QA lab technician traced it to copper on the projection-weld tip. Tip dressing dropped leaks to zero.
Verify bead profile, clamp resistance, and distortion, then run pressure and soap-bubble checks before it moves on. Our welding engineer told me: “If the fixture is off, the leak test just finds the mistake.”
⚡ Speed Verification: Clamp checks added 12 seconds per unit and cut leak rework by 90%.
Step 7: Apply anti-corrosion glass-lining and fire the tank finish
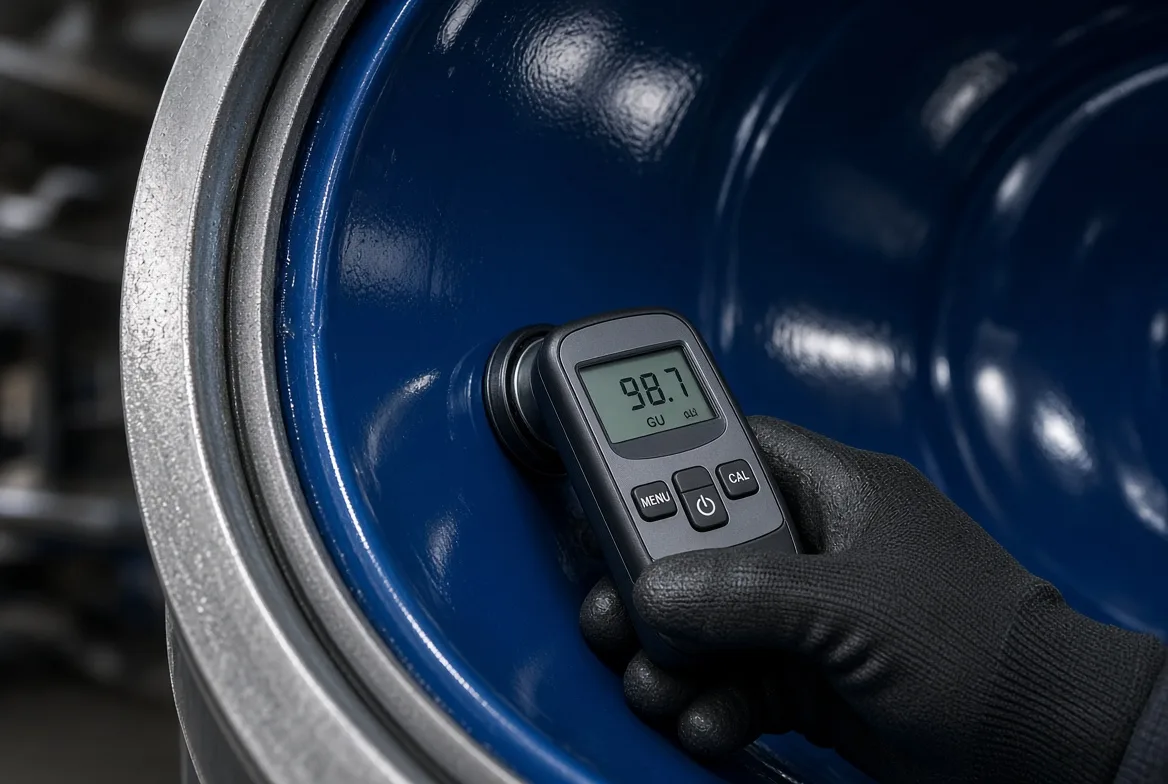
This stage fires the anti-corrosion glass lining onto the tank path. The result: a pinhole-free, fully fused enamel surface.
Sequence: pre-clean the steel, apply the frit slurry, fire the furnace, inspect post-fire. I asked Gulfstone’s manufacturing engineer Beck Zheng two questions.
Q: How is glass-lining engineered into the tank? A: “We control frit chemistry and seam coverage.”
Q: How do you balance thermal efficiency against corrosion and manufacturability? A: “Thinner lining helps heat transfer but risks holidays. Firing must fuse without warping.”
Our controlled firing profile peaks at 840 °C with a 10-minute soak; enamel thickness runs 0.30–0.50 mm.
Adhesion passes an impact test with no spall over 3 mm, and a 5 kV dielectric (holiday) scan must show zero pinholes on water-contact surfaces (reject limit: one holiday per tank on non-wetted areas). Post-fire gloss reads ≥ 60 GU.
Before release, the line lead Zhang checks coverage at the spud and seam, then runs a holiday tester and a gloss meter. Sensory check: high gloss, smooth texture, zero pinholes.
Verify coverage inspection, adhesion pass, and the documented cure record. This stage applies to lined tanks. Tankless builds shift corrosion strategy to material choice and coating stack.
⚠️ Experience Warning: One missing cure record stalled an RV OEM audit for three weeks.
Step 8: Vacuum-braze the compact heat-exchanger stack
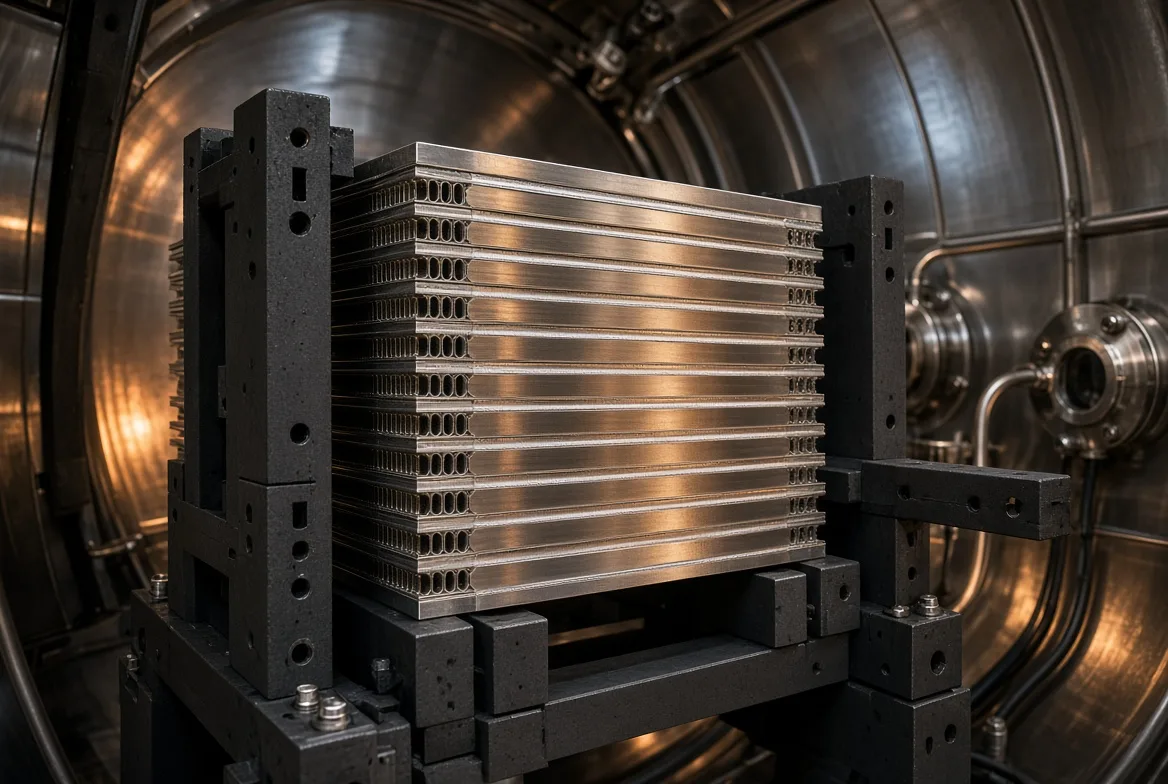
This step covers the compact heat-exchanger path used in tankless and hybrid RV heaters. Vacuum brazing is the primary joining method I document here.
Operators stack plates, fins, and turbulators into a graphite fixture, foil every seam, and clamp. Clean first: bare-hand oil becomes a void.
🔬 Sensory Check: A sound joint shows a continuous, oxide-free silver fillet. Chalky gray streaks or wavy plate edges mean a cold zone, weak vacuum, or a warped stack.
The vacuum furnace joins without flux, protecting narrow channels and holding leak resistance inside a tight RV envelope. Welding suits low-volume tanks but distorts thin plates.
The vacuum furnace runs at ≤ 5×10⁻⁴ Torr, ramps at 8 °C/min, soaks at 820 °C for 12 minutes (silver-based filler), then cools under controlled gas flow below 200 °C before unloading.
Verify fillet continuity, helium leak result, flow restriction, and thermal efficiency against the exchanger rating.
Our lead manufacturing engineer put it plainly: “A vacuum furnace never forgives a dirty stack.”
⚡ Speed Verification: The furnace run takes about 6 hours. Cleaning and fixing take longer.
Step 9: Run the electric RV water heater control board through the SMT line

The electric RV water heater manufacturing process is the board-and-controls branch inside RV heater manufacturing. Gas-electric and tankless builds share the same 12V control PCBA.
The sequence is fixed: solder-paste print, SPI, pick-and-place, reflow, AOI, functional test, firmware load, conformal coat, cure. I walked this line in Foshan.
🔬 Sensory Check: A sound joint looks smooth and bright. Dull joints fail AOI instantly. The cured coat feels tack-free; sticky batches fail my glove check.
Our SMT line leader told me: “Cold joints hide until the board sees vibration.” Those drive intermittent field failures that never show on the bench. Ask Gulfstone for AOI escape rate, coating chemistry, and cure window.
Verify powered ignition logic, continuity and ground validation, and serial-linked test logging. Reject joints against IPC-A-610, not eyeball calls.
A lower-tech variant exists: mechanical-control units run a bimetal thermostat and skip the PCBA.
⚠️ Experience Warning: A thin coat let condensation bridge a ground trace. It passed the bench test, then failed in the field.
Step 10: Install the gas valves, burners, igniters, sensors, and wire harnesses
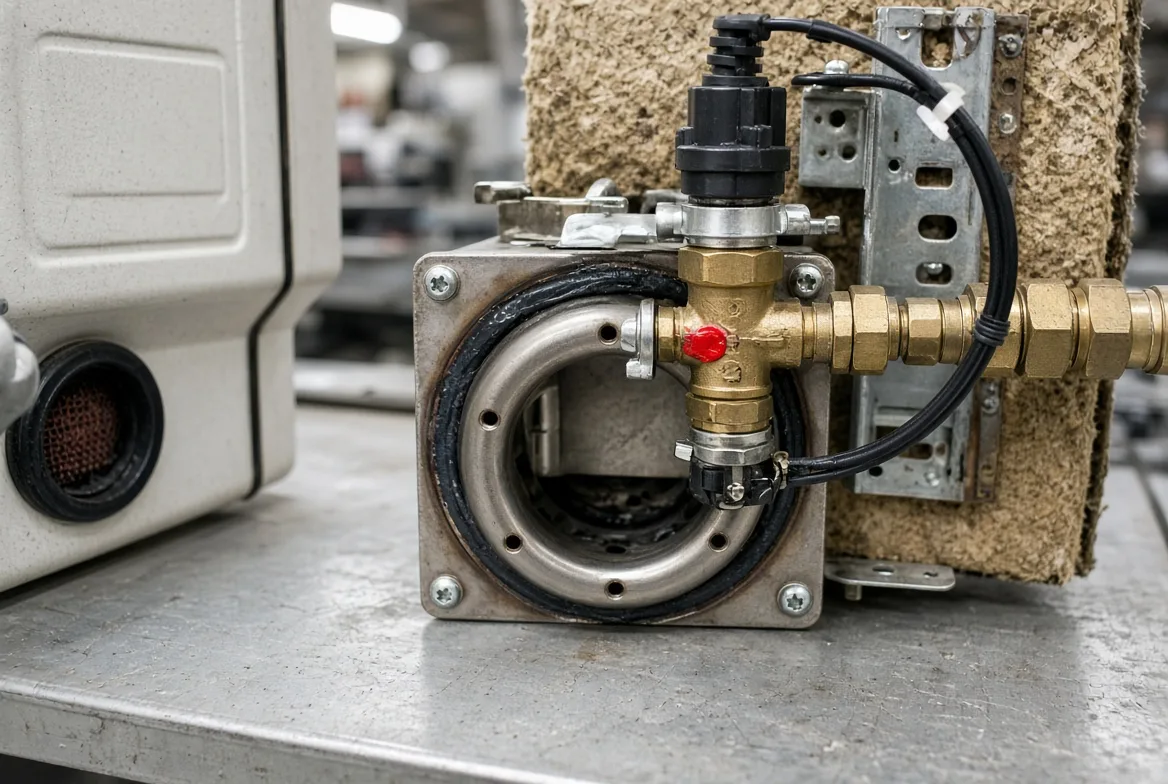
At this stage, a sealed tank passes to the gas-and-controls stack. Here is our assembly logic.
The line branches here. Gas-only modules take one gas valve, a burner, an igniter, insulation, and a high-limit switch. Gas-electric units add the thermostat, element, and plumbing fittings. Tankless cores swap tank hardware for a modulating valve and dual flame sensors.
OEM engineers care about service access, heat shielding, routing clear of hot zones, and repeatable torque.
Our line operator presses each connector until it snaps: one clean click, holding under a light tug. A good gasket compresses to an even bead, never a smeared edge.
Verify torque-paint marks, seated connectors, harness clearance, and service-door access to the igniter, flame sensor, and gas valve.
⚠️ Experience Warning: A harness routed too close to the burner chafed after 200 thermal cycles. Rerouting cost 20 seconds per unit and removed a real fire risk.
Step 11: Marry up the tank, shell, brackets, and anti-rattle hardware
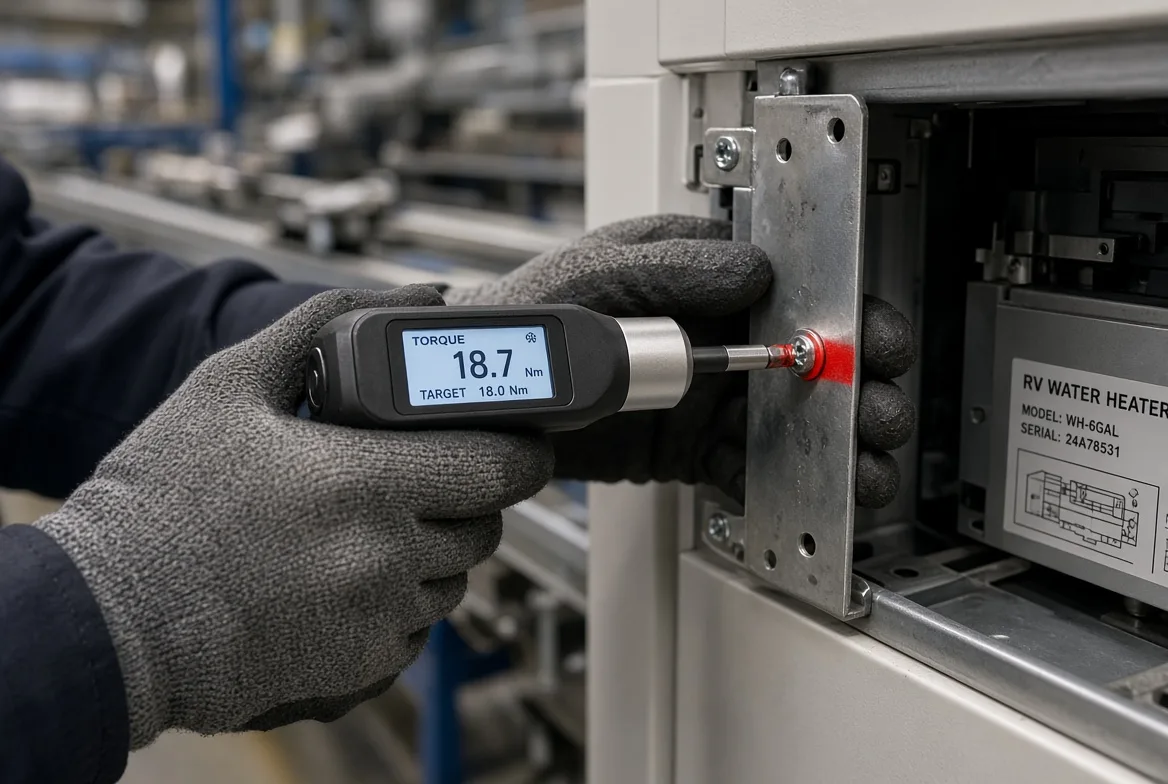
How do continuous-run owner behaviors change your OEM design requirements? Weeks-long run times shape this bench: thermostat behavior, clearance gaps, and vibration-proof retention all change.
- Drop the tank into the shell.
- Fit brackets, pack insulation, seat fasteners.
- Set anti-rattle features. Torque-paint marks confirm retention.
- Apply shutoff and bypass labels last, so covers block accidental misuse.
- Shake the unit. Road shock and thermal cycling decide whether to pass or fail.
🔬 Sensory Check: I watched an operator seat an access door last month. One soft thump, flush on all four edges. Run two fingers along that seam: a true seat feels smooth.
⚠️ Fit-up Warning: A 2 mm bracket drift once stopped a customer’s OEM line for a full shift. Fit-up is a supply-chain issue.
Verification check: final fit, service-door function, label traceability, vibration-risk review.
🧠 Expert Verdict: I trust the shake test over the spec sheet.
Step 12: Run final testing and sign the release gate
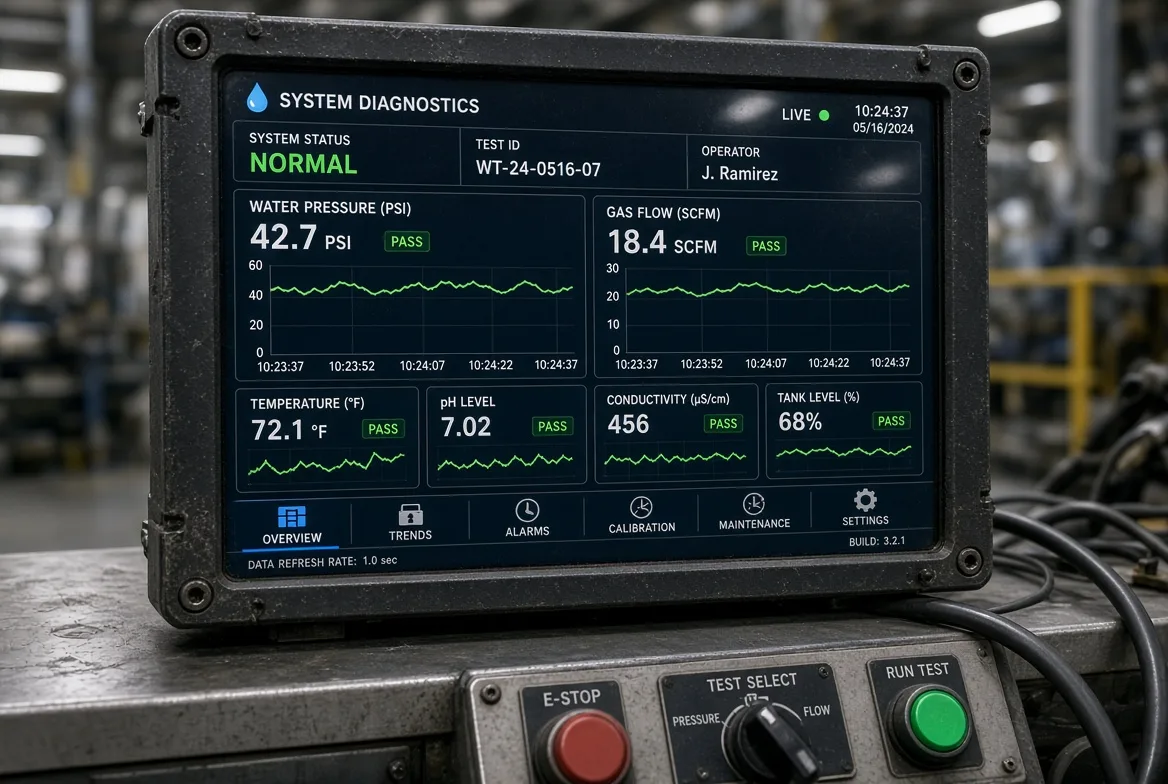
Testing and release are one gated phase. A unit ships only when both pass.
Every unit runs 100% inline: pressure, leak, and gas-leak checks, ignition, thermostat and temperature stability, electrical continuity and hi-pot, and water-flow.
Results log to the unit serial in the QMS. Hydrostatic burst and thermal-cycling are sample destructive tests, per lot, not per unit. That separates every-unit checks from lab-audit checks.
I withhold exact burst thresholds and weld-rejection triggers (Gulfstone controlled records, NDA). We publish the pass/fail leak logic, never a marketing number.
🔬 Sensory Check: I stand at the test bay and listen. A stable pressure hold, a steady flame, a normal fan hum, and zero gas odor mean pass. Any hiss stops the line.
Then packout: drop-tested cartons, a spare-parts list, the document packet, and serial-linked traceability. Your buyer signs the release record and the packout checklist.
The line is not done when the heater fires once. It is done when the data package is shipment-safe.
⚡ Speed Verification: Full test and release: about 22 minutes per unit. Ignition eats 90 seconds.
Common failure modes and the controls that catch them
In my experience, three failure modes dominate: leaks at brazed joints after vibration, hot-cold temperature swings from exchanger and sensor issues, and ignition faults after moisture reaches the board.
Leaks at welded and brazed joints
Problem: Water weeps at a seam after a few thousand road miles.
Process cause: Weak joining at Step 6 or the Step 8 vacuum-braze furnace. A dirty stack, low vacuum, or an undressed projection tip leaves a void that still passes the bench test.
Containment: Quarantine the lot. Pull helium-leak, pressure-hold, and fillet-continuity records. Re-test the full serial range.
Corrective action: Make helium leak a lot acceptance criterion. Log vacuum level per furnace run.
Last quarter, a stack failed to leak helium after 400 thermal cycles. Our manufacturing engineer traced it to a 0.3 mm void from handling oil on the plate. The fix was nitrile gloves plus a vapor-degrease step. It added 8 seconds per stack and took the void rate to zero.
Temperature swings and low-flow complaints
Problem: The unit cycles hot-cold, or the shower drops to a trickle.
Process cause: Oversized channels in the exchanger, a sensor drifting past calibration, or control logic tuned for tank volume instead of tankless flow.
Containment: Bench-test three units against the flow curve.
Corrective action: Recalibrate sensors at Step 9. Lock firmware to the tested release.
Ignition faults and board failures
Problem: No ignition after rain or a rough drive.
Process cause: Thin conformal coating lets condensation bridge a ground trace. Cold SMT joints open under vibration.
Containment: Re-screen at AOI. Glove-check coating tack each batch.
Corrective action: Raise coating coverage at ground pads. Add a vibration step to the PCBA plan.
We also see bypass-valve complaints that trace to label confusion: the shutoff label sits under the cover. That is voice-of-customer evidence. It changes our instruction sheet, not our weld fixture.
🛡️ Prevention: Before you negotiate price, ask for the containment loop and the preventive control behind it.
Good factories do not hide failure modes. They show you the fix and the control they added.
Final thoughts
RV water heater full replacement is not a consumer swap. For OEM buyers, it means re-qualifying a supplier, redesigning a platform, or moving the whole heater line to a new partner. That is a sourcing decision, not a repair.
You now hold a stage-by-stage audit framework for any RV water heater supplier. Put it to work: request weld thresholds, ask for brazing parameters, verify SMT coverage, inspect the test-data trail, and review the compliance pack. For adjacent context, explore the broader RV water heater range.
Ready to move? Request a factory review, and we will walk your team through a line audit, a DFM review, or a sit-down on our raw test data.
Disclosure: This piece is manufacturer-authored. It draws on Gulfstone’s own line, engineer interviews, and internal QA records, not an independent cross-brand comparison.
Frequently asked questions about the RV water heater manufacturing process
Who makes RV water heaters?
RV water heaters are made on lines that are split by architecture rather than brand: tank-style, tankless, gas-only, and gas-electric builds, each needing its own tooling. In our Foshan plant, Gulfstone runs compact lines across all four. The tank-style vessel decides the welding method, glass-lining recipe, control-board layout, and leak-test protocol, so the build choice comes before any logo.
What should an OEM buyer audit before sourcing RV water heaters from a new supplier?
Start with the paper trail: a signed design-freeze package, approved CTQ dimensions, the control plan, and the PFMEA. Then ask for the numbers behind the line: weld thresholds from the WPS, vacuum-brazing parameters, the SMT AOI escape rate, and the serial-linked test logs that Step 12 writes to the QMS. A supplier that shares its pass/fail logic and its containment loop — not marketing numbers — is one you can certify.
How does continuous-use owner behavior affect OEM design?
Continuous-run owner behavior changes three build decisions: thermostat behavior, clearance gaps, and vibration-proof retention on the assembly bench. We also fit shutoff and bypass labels so covers block accidental misuse, and labels trace back to the unit record.
Does every RV water heater get pressure and leak tested?
Yes, every RV water heater runs 100% inline testing before release: pressure, leak, and gas-leak checks, ignition, thermostat and temperature stability, electrical continuity and hi-pot, and water-flow. Results log to the unit serial in the QMS. Hydrostatic burst and thermal-cycling are sample destructive tests per lot, not per unit, so every-unit checks stay separate from lab-audit checks.

Forward
Founder & CEO, GulfstoneGas appliance manufacturing and certification
Most of what decides a gas appliance is settled before anything is built — on the drawing, at the cut-out, in the tolerance someone chose for the gas path. I have spent my working life on the manufacturing side of that decision, and this is where I write down what it has taught me.
Nothing here is written from a sales desk. Every note comes off the floor: a batch held until a reason was found, a fitting that failed in transit, an approval path that only made sense once the destination market was fixed. If you read these first, the opening conversation starts at the standard rather than at the beginning.
- Gas water heater engineering
- Design for manufacturing
- Certification path selection
- Private-label tooling
- Off-grid and outdoor water heating
- Downsides of Subcontracting: Hidden Sub-Tier Audit ChecklistSep 29, 2026
- Vet an RV Appliance Manufacturer in China: A Five-Gate AuditSep 28, 2026
- Gas Appliance Testing Laboratory: Audit a Factory Bench Before You Approve ItSep 24, 2026
- OFHC Copper Heat Exchanger: Engineer More Efficient SystemsSep 21, 2026
- RV Water Heater BTU Sizing: Match Power to Real Water DemandSep 16, 2026
- Proportional Gas Valve RV: Unlock Steady Heat and ControlSep 12, 2026
Two decades on the manufacturing side of gas appliances, from the drawing to the shipping container.
Leads Gulfstone's design-for-manufacturing reviews and the certification path selected for each destination market.
Works directly with OEM and private-label buyers on tooling, tolerances and the approval file.