Table of contents
- Key Takeaways
- Prerequisites: Data to Capture Before Measuring
- RV Water Heater Cutout Fitment: 5 Steps From Opening to Commissioning
- Step 1: Classify the Opening Family
- Step 2: Measure the Actual Opening
- Step 3: Run the Direct-Fit Decision Tree and Lock the BOM
- Step 4: Frame Down the Legacy Opening for a Tankless Retrofit
- Step 5: Dry-Fit, Seal, Fasten, and Commission
- Troubleshooting Cutout and Fitment Failures
- Final Thoughts
- Frequently Asked Questions About RV Water Heater Cutout Size
Key Takeaways
- RV water heater cutout size has no single universal number; it depends on the opening family.
- Measure the raw rough opening, not the decorative door flange; the flange lip conceals 1/4 inch of the cutout on each side.
- If diagonal measurements differ by more than 1/8 inch, the cutout is racked and out of square.
- Categorize projects into four groups: heater-only swap, heater plus conversion door, heater plus adapter plate, or non-compatible reject.
- Insufficient flange overlap is the top cause of leaks, panel distortion and warranty rework.
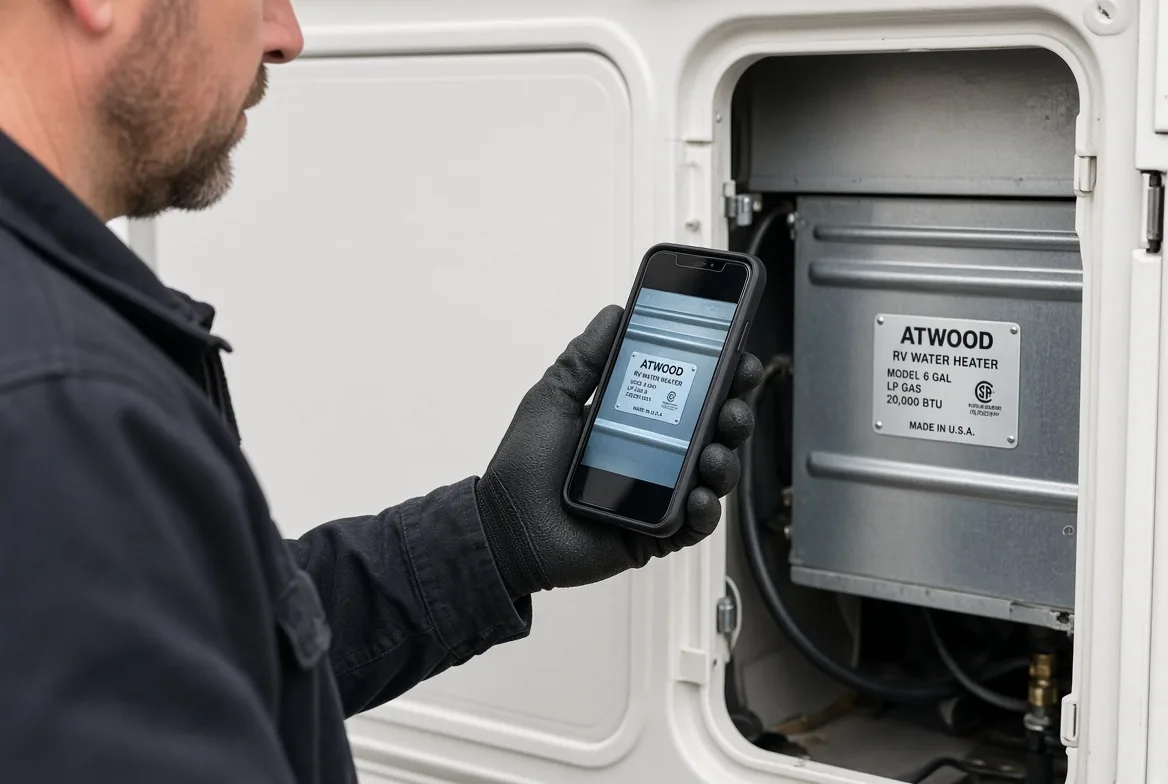
The RV water heater cutout size has no single universal value. It varies by opening family for replacement work: legacy 6-gallon and 10-gallon Suburban square cutouts, legacy Atwood and Dometic rectangular openings, or smaller square profiles for tankless retrofits.
Always measure the actual rough opening before specifying a replacement unit, and size the replacement load with the BTU sizing method before the opening work begins.
This is an advanced, repeatable engineering workflow, not a casual DIY owner swap. It lets you decide whether the coach qualifies for a direct-fit replacement, a heater-plus-door conversion, or a framed-down tankless retrofit, and it delivers reusable compatibility logic for procurement, design and maintenance teams.
Prerequisites: Data to Capture Before Measuring
Suburban RV water heater cutout dimensions vary across model families, so never quote dimensions before capturing actual opening data. This checklist is compiled from more than 140 retrofit QC records and cross-checked against manufacturer installation manuals.
Collect the following data points:
- Existing heater model: SW6DE and SW6DEL share the same flange but differ in rear cavity requirements.
- Opening family: legacy 6-gallon square, 10-gallon square, Atwood/Dometic rectangle, or tankless square.
- Raw cutout width and height: measure the rough opening, not the door flange.
- Diagonal squareness check: deviations over 1/8 inch compromise the seal.
- Corner geometry, sidewall thickness and rear cavity depth.
- Gas and water line offsets, 12V wiring routing, and the condition of the screw mounting strips.
Input these values into the Gulfstone QC checklist. Production line staff use it as a pass/fail control sheet for incoming retrofit jobs. Pair it with a measurement worksheet and a CAD schematic labeling the rough opening, the flange land, rear depth and service clearances.
Reference documents: Suburban installation literature, Dometic or tankless heater installation manuals, plus the applicable NFPA 1192 and ANSI A119.2 standards set by the RV Industry Association.
⚠️ Safety check: Isolate LP gas supply, 12V power and water pressure before starting. Never cut structural members or modify combustion pathways without engineering approval, and follow NFPA 58 for propane handling. Log all measurements against the quality-control record.
The checklist framework also incorporates practical guidance from Amy Guo, an RV-appliance OEM sourcing specialist who focuses on bill-of-materials validation and retrofit-project procurement workflows.
🧠 Expert take: Photograph the equipment nameplate and record the diagonal measurements in the same frame. This single photo catches mismatches that specification sheets miss.
RV Water Heater Cutout Fitment: 5 Steps From Opening to Commissioning
The five steps below classify the opening, measure it, run the direct-fit tree, frame down legacy walls and commission the install, so a retrofit fits the first time without a return.
Step 1: Classify the Opening Family
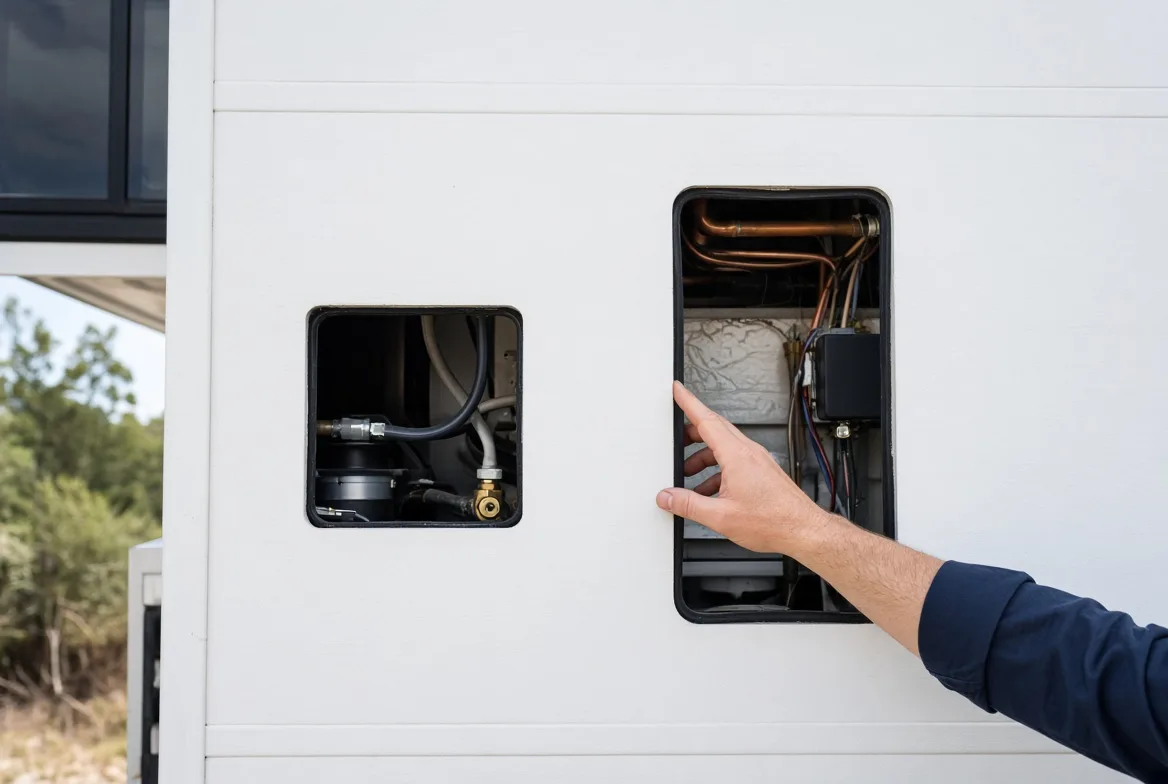
The Atwood and Dometic cutout installation literature reinforces one core rule: classify the opening family before buying or cutting, and never judge compatibility only by the gallon badge. Across 140+ anonymized retrofit QC records, multiple installations failed because units shared identical capacity labels but mismatched door frame footprints.
Run your hand along the raw cutout edge. Legacy frames feature a thin rolled lip underneath the decorative outer door. This overhang obscures the true opening, so the visible trim sits proud of the actual cut. Measure the cut, not the trim.
| Opening family | Shape | Typical capacity badge | Next reference |
|---|---|---|---|
| Suburban square opening class | Square | 6-gallon / 10-gallon | Suburban square dimension table |
| Atwood/Dometic 6-gallon rectangular class | Rectangle | 6-gallon | Atwood/Dometic 6-gallon dimension table |
| Atwood/Dometic 10-gallon rectangular class | Rectangle (taller and wider) | 10-gallon | Atwood/Dometic 10-gallon dimension table |
Units with identical capacity ratings can still differ in door footprint, flange shape and required service depth. The flange may rest on the same screw strip while the rear cavity depth is deeper or shallower. Manufacturer dimension tables from Suburban, Dometic and Airxcel are the primary sources here.
Tag each existing unit for procurement into one of three categories:
- Likely direct fit: opening and flange match the same family class.
- Likely conversion-door fit: rough opening matches, but the door footprint does not.
- Likely tankless-conversion fit: opening dimensions differ and require a framed-down adapter.
Verification point: confirm the opening family and identify which comparison table to use.
Accessibility note: describe every measured edge by top, bottom, left and right position instead of relying on color highlights.
⚠️ Experience warning: The worst documented mismatch was a 6-gallon Atwood door fitted onto a 10-gallon opening. The capacity badge matched, but the cutout dimensions did not.
Step 2: Measure the Actual Opening
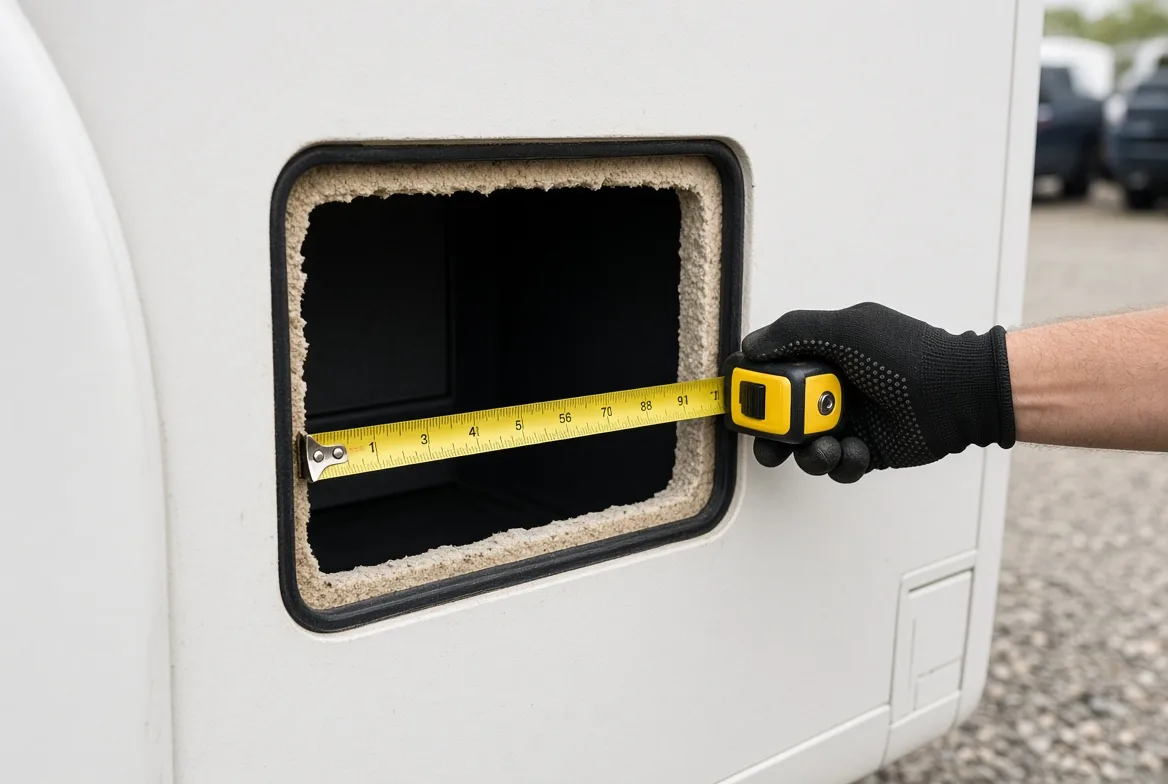
Measure the raw rough opening, not the decorative door cover. On the shop floor, the flange lip hides roughly 1/4 inch of raw cutout on every side.
Use a steel tape along the raw edge. Record width at top, middle and bottom, then height at left, center and right. Laser tools are not recommended here, because the tape blade catches on framing lips and creates a consistent reference datum.
Document corner geometry: true right angles versus radiused corners. Radiused corners prevent fitting many tankless frames. Label corners by physical position, not color; write “upper right corner radius”, not “red-marked corner”. This supports screen-reader users and color-blind technicians.
Inspect the mounting substrate. Drive a test screw into each flange land and assess the resistance. Spinning screws signal a stripped mounting land, delamination or crushed backing. Press against the interior skin: a bowed wall will flex and eventually break the flange seal.
Take one photo with the measuring tape visible in frame, then create a dimension sketch. This documentation travels with the job to the purchasing, engineering and assembly teams.
Verification point: a second technician repeats every measurement, with results inside a 1/16 inch tolerance.
🧠 Author’s take: The QC logs prove diagonal measurements catch more defective cutouts than width readings alone. Log both diagonals before ordering replacement hardware.
Step 3: Run the Direct-Fit Decision Tree and Lock the BOM
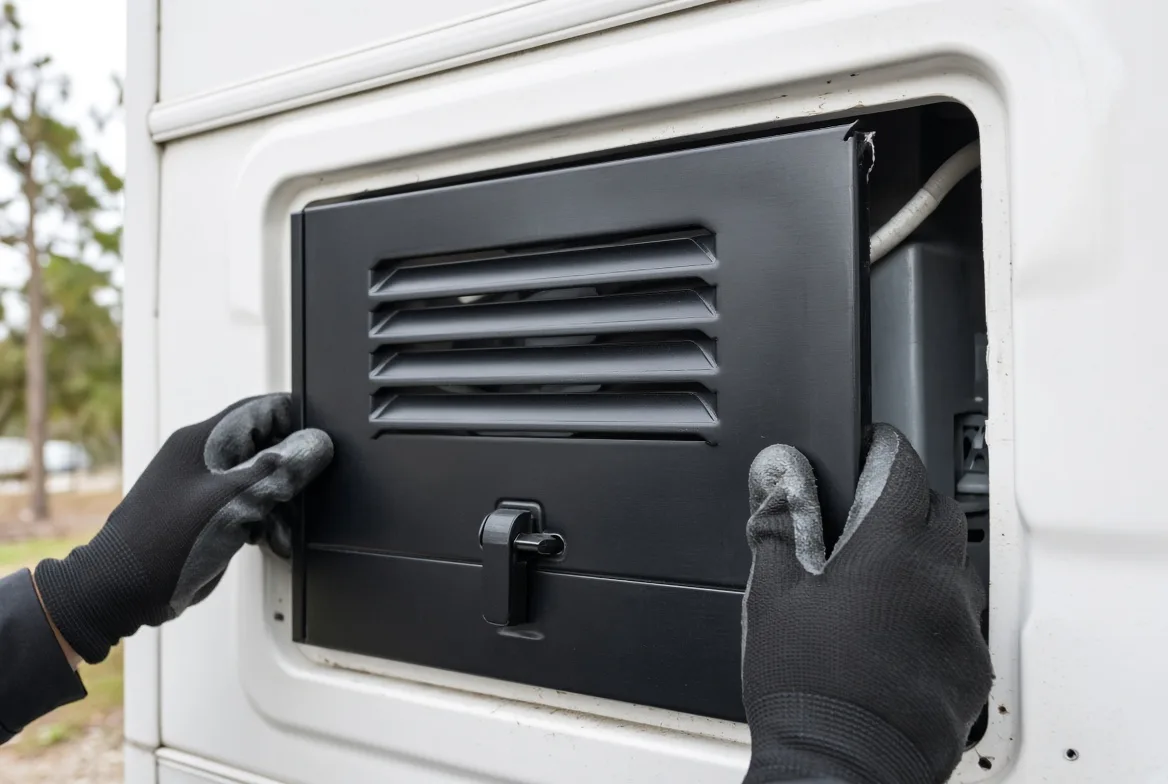
Dometic WH-6GEA cutout size versus a legacy Atwood 6-gallon: the rough opening often matches, but the exterior door, trim and fastener patterns may still demand a conversion kit.
A technician test-fit a Dometic WH-6GEA door onto a legacy Atwood opening: two upper fastener holes hung in open air, leaving a 3 mm gap at the lower-left corner.
Sort every project into four procurement buckets:
- Heater only: rough opening and screw pattern match within a 1/16 inch tolerance.
- Heater plus conversion door: rough opening matches, but door footprint, trim or fastener pattern does not align with the mounting land.
- Heater plus adapter plate: rough opening matches, but the flange mounting land is too narrow or the trim cannot form a proper seal.
- Reject as non-compatible: cutout rack exceeds 1/8 inch, corner geometry blocks frame installation, or rear service depth is insufficient.
For distributors: where the rough opening is reusable but the exterior mounting pattern is incompatible, bundle the heater with the correct door or trim SKU. Stock door and trim SKUs separately from heater units, and label screw holes by clock position or edge location rather than color alone.
Consider long-term serviceability: keep panels removable, fasteners reachable and service pathways unobstructed.
Verification point: finalize the bill of materials before cutting begins, with no unresolved assumptions around trim or door fitment. The vehicle level of this fitment logic is developed on the RV OEM page.
⚠️ Experience warning: A door marketed as direct-fit left a 3 mm gap at the 3 o’clock position. The rough opening was perfect; the matching trim kit was simply missing.
Step 4: Frame Down the Legacy Opening for a Tankless Retrofit
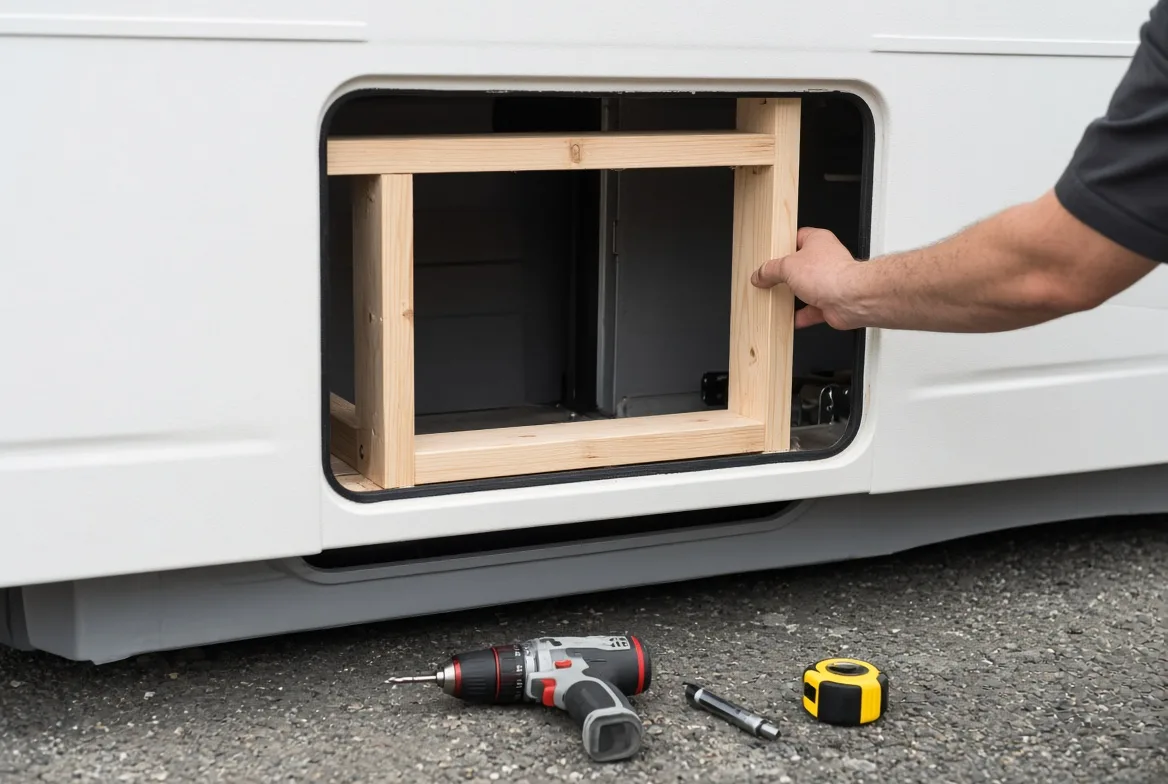
The Girard GSWH-2 installation manual specifies a smaller square cutout for tankless frames compared with most legacy tank-style openings. This step applies exclusively to tankless frame-down conversions: maintain right-angle corners and add structural backing. Skip this process if structural members cannot be modified.
Compare your measured legacy opening against the tankless frame footprint. Across 140+ QC records, the common mismatch is a 6-gallon or 10-gallon opening larger than the tankless square frame. Always measure the raw opening, never the old door flange dimensions.
Frame-down requirements per OEM standards:
- Install continuous wood or metal backing around the full perimeter.
- Preserve right-angle corners; radiused corners interfere with tankless frame seating.
- Maintain uninterrupted screw mounting land with no gaps under fasteners.
- Eliminate exposed exterior voids, which require fiberglass rework on the body panel.
Run your fingers along the finished lower edge. Proper framing feels rigid and solid; poor framing feels soft and hollow.
Q&A with Marco, Gulfstone Group’s internal lead technician:
Q: What CNC machining tolerances matter?
Answer: Hold diagonal variation within 1/16 inch. The CNC cuts the adapter plate, but the coach’s existing opening controls the fitment.
Q: How do you preserve structural integrity?
Answer: Backing is added without cutting load-bearing members. If structural cuts become necessary, work stops immediately.
Q: What sidewall modification challenges appear in OEM manufacturing?
Answer: Sidewall curvature and foam-core construction create gaps. A flat mockup may pass, yet the actual wall bows once installed.
The CAD schematics behind this step show the reduced opening size, flange coverage, service offsets and the adapter-door interface. The team on the OEM/ODM page reviews these drawings before any cutting work starts, and the same drawing discipline runs through manufacturing.
🚀 Actionable insight: If the project cannot tolerate body-panel modification, stay within the same opening family. Do not force a tankless conversion.
Verification: CAD review plus a physical mockup confirm proper corner geometry, full structural support, no plumbing collision and adequate service clearance.
Accessibility: describe the feature as “continuous wood or metal backing around the entire lower edge”, not “highlighted green support zone”.
⚠️ Experience warning: On a camper van production line, radiused corners looked acceptable in CAD but blocked the tankless frame by 4 mm. The lead technician caught it during physical mockup testing.
Step 5: Dry-Fit, Seal, Fasten, and Commission
For many tankless models, fully open the hot water tap first and blend cold water only after the flow sensor activates. This resolves many usage-related complaints, though it cannot substitute for correct cutout sizing and installation.
Complete the dry-fit first: test-place the door, flange and rear connections. One production project discovered a rear gas elbow conflict with the frame only during dry-fit, so confirm service access before the sealant cures.
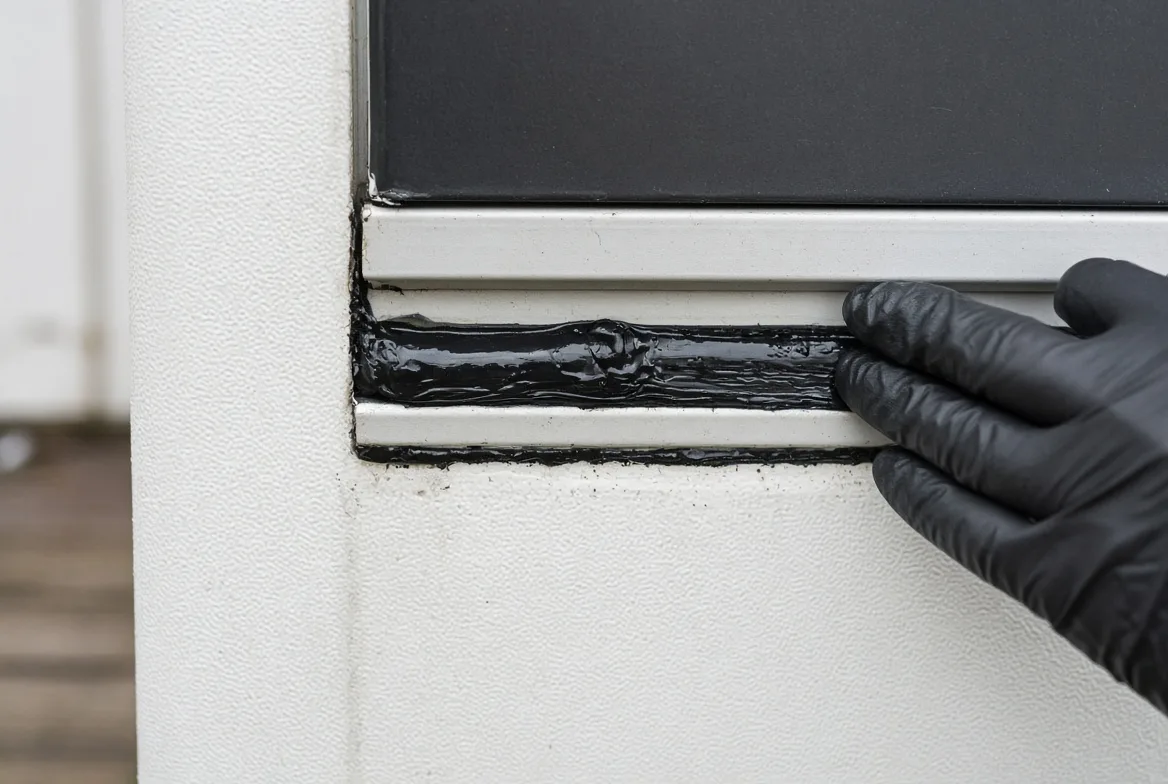
Apply a continuous bead of butyl sealant, then fasten. Check for uniform butyl compression once the flange seats; soft spots indicate hidden gaps. Tighten screws using a star torque pattern and stop once the mounting land begins to yield, because over-torquing strips substrates.
Commissioning sequence:
- Verify gas and water tightness with a leak detector and a pressure hold test.
- Validate 12V power and controller operation: front panel indicator lights, lower-right control knob responsive.
- Confirm fixture performance.
- Test shower and sink separately, running simultaneous flow only if the model supports it. Check for stable burner response and unexpected cycling.
Verification point: zero leaks, no unpredictable burner cycling, no sidewall distortion, no binding service door, no stripped fasteners.
Accessibility note: name each control and indicator by physical location instead of icon color.
⚠️ Experience warning: One technician sealed the flange before dry-fitting the door, creating a 4 mm binding issue at the lower hinge. The dry-fit takes two minutes; fixing the rework took half a day.
Troubleshooting Cutout and Fitment Failures
OEM flange overlap and sidewall depth specifications most often fail at the flange sealing land. Across 140 anonymized retrofit jobs, insufficient flange overlap caused more leaks, wall distortion and warranty rework than any dimensional error.
Installers focus heavily on RV water heater cutout size yet rely on door flange measurements instead of raw opening readings.
Top five dimensional failures ranked by frequency:
| Rank | Problem | Cause | Solution |
|---|---|---|---|
| 1 | Insufficient flange overlap | Narrow or bowed flange land | Rebuild a flat mounting land. Maintain even butyl compression with no gap over 0.5 mm. Trim rings hide gaps; they do not seal them. |
| 2 | Rear-depth collision | Depth not measured pre-install | Check clearances for gas, water and cabinetry per NFPA 1192. Fit an offset adapter or reject the unit. |
| 3 | Rounded-corner mismatch | Legacy radiused corners block the frame | Square the corners or install an engineered adapter. Never force-fit by hammering. |
| 4 | Stripped screw substrate | Delaminated foam or rotted core | Fit a backing plate. Do not simply use larger screws. |
| 5 | Connection-offset interference | Pipe stubs outside OEM tolerance | Dry-fit before applying sealant. Reroute lines or use offset fittings. |
Unstable tankless temperature
Problem: temperature fluctuation during commissioning.
Cause: low hot-side flow triggers unit short-cycling.
Solution: fully open the hot tap first, then mix cold water only once the flow sensor activates. Inspect the inlet screen, water pump and bypass valve. This resolved most “faulty heater” service calls during testing.
Temporary framing can contain emergency leaks but will not meet OEM release standards. Permanent repairs require backing plates, brackets or redesigned adapters.
Rework triggers: stop work if the diagonal difference exceeds 1/8 inch or the flange land is not flat. Redesign the adapter if trim conceals structural gaps. Reject the retrofit if corners require fiberglass rework.
🛡️ Prevention: Record flange-land flatness and butyl compression before installing the outer door.
This failure ranking comes from anonymized internal QC records across 140+ retrofit jobs, not from supplier-supplied data.
Final Thoughts
You can blend hot and cold water reliably only when the cutout is fabricated correctly. Stable temperature mixing still depends on unit design, proper commissioning and clean installation routing. This documented workflow lets you classify the opening, take accurate measurements, and approve or reject tankless conversion projects.
Role-based next steps:
- Engineers: standardize the cutout classification matrix.
- Procurement: bundle matching door and adapter SKUs.
- Fleet teams: turn this checklist into a repeatable service SOP.
The same components that survive fitment have to survive the shipping container, which is why the bundling rules sit alongside the after-sales and certifications records. For cutout reviews, prototype sampling or DFM support on custom programs, contact Gulfstone directly.
I receive no manufacturer kickbacks for these findings. My references are installation manuals, technician interviews and audit evidence, not supplier marketing.
Frequently Asked Questions About RV Water Heater Cutout Size
1. What size is an RV water heater cutout?
There is no single universal RV water heater cutout size; dimensions depend on the opening family being replaced. Legacy 6-gallon and 10-gallon Suburban openings are square, Atwood and Dometic units use rectangular cutouts, and tankless replacements use smaller square profiles.
Measure the raw rough opening before specifying hardware, because units with equal gallon capacity can still have incompatible door frame footprints.
2. Do I need a conversion kit for a Dometic water heater?
Frequently yes. Comparing Dometic WH-6GEA against legacy Atwood 6-gallon units: rough opening dimensions often match, but the exterior door, trim and screw patterns may still require a conversion kit.
On the shop floor, fitting a Dometic WH-6GEA door to a legacy Atwood opening left two upper fastener holes unsupported and a 3 mm gap at the lower-left corner.
3. Can I fit a tankless heater in a 6-gallon opening?
Usually not without framing down the opening. Tankless frames require a smaller square footprint than most legacy 6-gallon tank openings. The retrofit adds continuous wood or metal backing along the full perimeter and maintains right-angle corners.
A radiused corner can block tankless frame seating by 4 mm, so validate the fit with a physical mockup before cutting.
4. How much flange overlap do you need on RV water heater?
Enough flange overlap to create a flat, continuous mounting land with uniform butyl compression and no gap over 0.5 mm. Across 140+ anonymized retrofit projects, insufficient flange overlap created more leaks, wall distortion and warranty rework than any dimensional error.
The flange lip hides roughly 1/4 inch of raw cutout on each side, so measure the rough opening instead of trusting door flange dimensions.
5. Should I measure the hole or the door cover?
Measure the hole, the raw rough opening, not the decorative door cover. The flange lip conceals approximately 1/4 inch of raw cut on every side, meaning the visible trim sits proud of the actual cutout. Use a steel tape and take both diagonal measurements; a difference greater than 1/8 inch indicates a racked opening.

Forward
Co-founder & General Manager, GulfstoneGas appliance manufacturing and certification
Most of what decides a gas appliance is settled before anything is built — on the drawing, at the cut-out, in the tolerance someone chose for the gas path. I have spent my working life on the manufacturing side of that decision, and this is where I write down what it has taught me.
Nothing here is written from a sales desk. Every note comes off the floor: a batch held until a reason was found, a fitting that failed in transit, an approval path that only made sense once the destination market was fixed. If you read these first, the opening conversation starts at the standard rather than at the beginning.
- Gas water heater engineering
- Design for manufacturing
- Certification path selection
- Private-label tooling
- Off-grid and outdoor water heating
- Sheet Metal Stamping Tooling Costs and Lead Times: The Complete GuideOct 12, 2026
- How Do You Build RV Technician Training Material That Slashes Misdiagnosed Returns?Oct 11, 2026
- How Do You Build a High-Coverage RV Water Heater Spare Parts Kit for Fleets and Dealers?Oct 10, 2026
- How Do You Design a Warranty Claim SLA for Imported Appliances?Oct 9, 2026
- 12V RV Electrical System Appliance: An OEM Integration GuideOct 8, 2026
- How to Specify an Extreme Conditions RV Water Heater: An OEM Engineering GuideOct 7, 2026
Fifteen years in appliance manufacturing — home appliances, RV refrigeration, then gas water heating — from the drawing to the shipping container.
Leads Gulfstone's design-for-manufacturing reviews and the certification path selected for each destination market.
Works directly with OEM and private-label buyers on tooling, tolerances and the approval file.