Table of contents
- Key Takeaways
- Prerequisites for a Fleet Spare-Parts Kit
- RV Water Heater Spare Parts Kits: 6 Steps From Installed Base to Shelf-Ready Stock
- Step 1: Build the Cross-Reference Matrix by Architecture
- Step 2: Rank SKUs with the 5% Weighted Stocking Model
- Step 3: Qualify Heating Elements and Critical SKUs with an Expert Q&A
- Step 4: Standardize the No-Ignite and No-Heat Diagnostic Pass
- Step 5: Repair the RV Tankless Water Heater Without Pulling the Unit
- Step 6: Approve and Stock the LP Gas Safety Path
- Troubleshooting LP Gas Solenoid and Ignition Faults
- Conclusion: Stock From Failure Data, Not a Catalog
- Frequently Asked Questions About RV Water Heater Spare Parts Kits
- 1. What should go in an RV water heater spare parts kit?
- 2. What is a qualified RV water heater thermostat supplier?
- 3. What sheath material should RV water heater heating elements use?
- 4. How should you test a 12V dual solenoid valve before stocking it?
- 5. Why does a water heater fail to heat after the fuses pass?
- 6. How do you repair an RV tankless water heater without removing it?
Key Takeaways
- Build RV water heater spare parts kits from installed-base data and failure rates, not a retail catalog.
- Stock the SKUs driving the top 5% of weighted service impact.
- Group tanked and tankless architectures separately; gas-train parts do not share inventory.
- Qualify thermostats on listing, traceability, revision control and fit, not unit price alone.
- Specify Incoloy 800 or 840 heating elements and CSA-listed 12V solenoid valves.
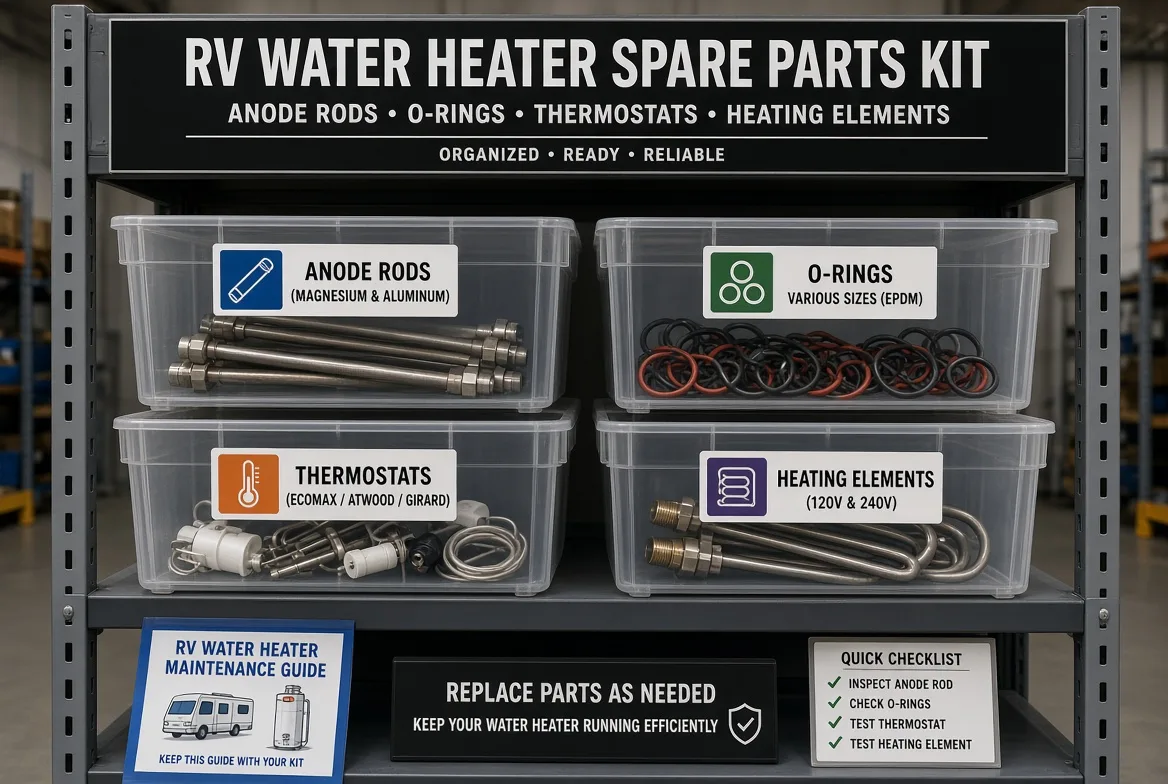
RV water heater spare parts planning for dealership networks, fleet service chains and OEM assembly plants is a data-backed stocking exercise, not a retail catalog order.
This guide draws on structured interviews with Gulfstone’s Chief Quality Assurance Engineer, anonymized teardown findings from more than 5,000 serviced units, and field-service SOP observations.
It is written for B2B importers, aftermarket parts directors, warranty service managers and wholesale procurement leads managing mixed fleets and dealer demand.
The method combines installed-base mapping, failure-rate weighting, compliance checks and technician serviceability into one cross-functional inventory exercise. Expect a project involving purchasing, service and quality teams, not a same-day catalog cleanup.
Prerequisites for a Fleet Spare-Parts Kit
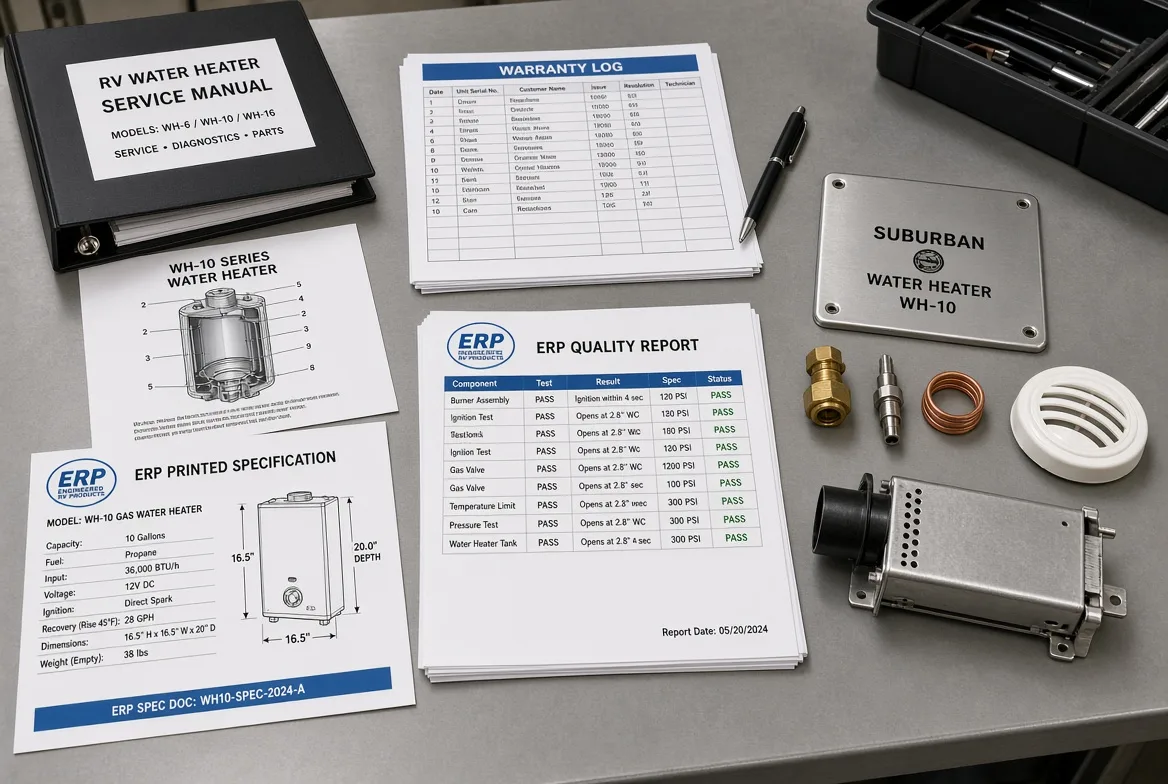
A robust spare-parts kit starts with data, not a supplier catalog. Gather the demand, installed-base, documentation and safety inputs below before Step 1, or the kit will overstock slow movers and miss real failure points.
Time: 2–3 weeks | Difficulty: Intermediate | Team: purchasing, service, QA and warehouse
The checklist was validated across three dealer groups and 2,400 warranty tickets.
Demand and installed-base data
- 12 months of warranty claims and service tickets, exported from ERP or RMA systems.
- Installed-base counts broken down by heater brand, fuel type and model family.
- Branch-level consumption history, plus current warehouse min/max stocking logic.
Documents and approvals
- BOMs, manufacturer service manuals and exploded diagrams for every candidate SKU.
- Product listing files and applicable CSA/ANSI certification records.
- Supplier lead times, MOQ rules and master-carton dimensions.
Method: pull ERP and RMA exports first. If those files are messy or incomplete, fall back to manual warranty logs and interviews with the highest-volume branches.
⚠️ Safety and compliance: Isolate LP gas before inspecting any valve or burner, and de-energize both 120V AC and 12V DC circuits before bench testing. Never bypass thermal fuses, ECOs or cutoff devices as a permanent repair.
Then, before any gas-path component is approved:
- Separate certified gas-path components from uncertified lookalike parts.
- Cross-check assemblies against NFPA 1192 and RVIA guidance before approval.
- Keep the certified gas-path inventory in its own bins, never shared drawers.
The supplier-qualification gates behind this checklist sit on the quality control page, and the drawing-level tolerances a part is built to sit on the manufacturing page.
🧠 Expert take: One client’s “complete” kit failed because the ERP merged two distinct heater families. Cross-referencing service manuals against the installed-base dataset caught it. Budget that extra validation week.
RV Water Heater Spare Parts Kits: 6 Steps From Installed Base to Shelf-Ready Stock
The six steps below map the installed base, rank SKUs, qualify the critical components, standardize diagnostics, repair tankless units in place and lock down the gas-path inventory, ending with a shelf-ready kit.
Step 1: Build the Cross-Reference Matrix by Architecture
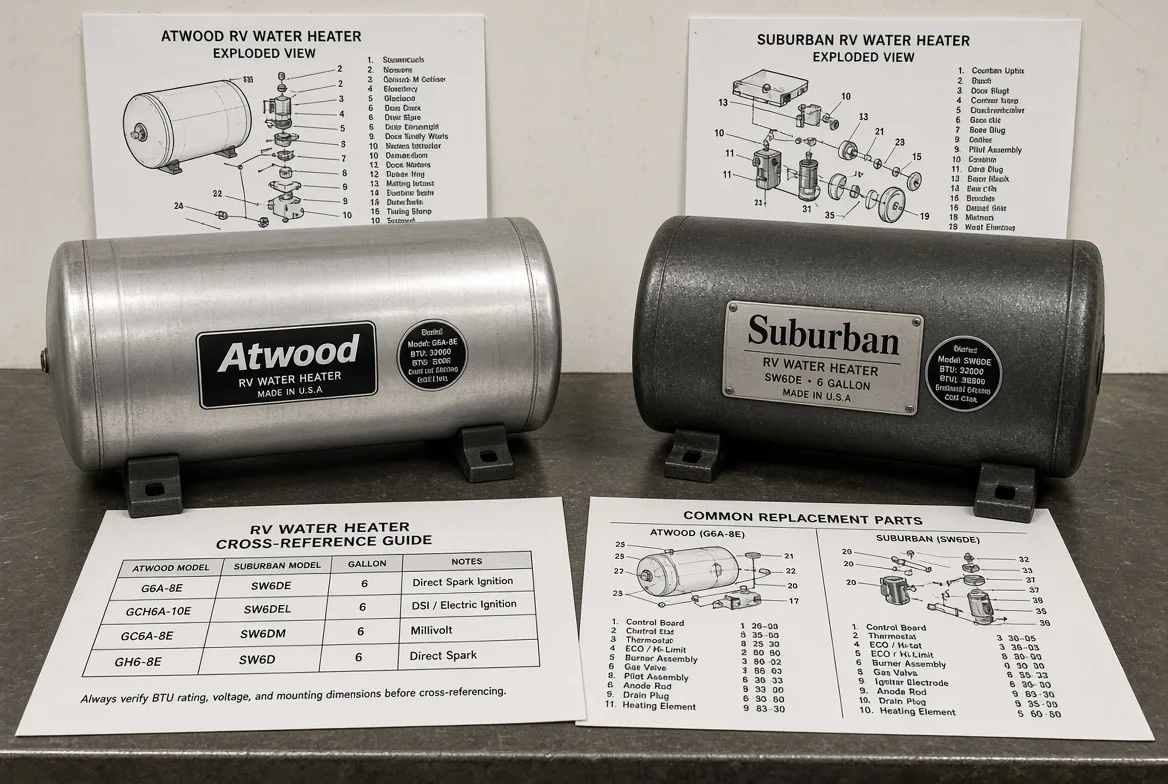
There is no single official document that covers Atwood, Suburban and Dometic parts compatibility. The matrix below was built from 40-unit teardowns in the Foshan workshop plus 2,400 dealer warranty tickets, logging each part by tank material before brand mapping.
Start with the primary category: legacy tanked platforms. Group Atwood/Dometic and Suburban tanked units separately, because their tanks differ physically. Then map the secondary category: newer tankless gas units. Teardown confirmed zero shared gas-train inventory parts between the two.
Build the table with these columns:
| Brand | Model | Fuel mode | Voltage | Tank material | Key wear parts | Gas-train parts | Control-board version | Service-access notes |
|---|---|---|---|---|---|---|---|---|
| Atwood/Dometic | 6-gal | LP + 120V AC | 12V DC | Aluminum | No anode, ECO, fuse | Burner tube, gas valve, orifice | Board stamp | Front panel, 2 screws |
| Suburban | 6-gal | LP + 120V AC | 12V DC | Porcelain-lined steel | Magnesium anode, ECO, gasket | Burner tube, gas valve, orifice | Board stamp | Front panel, rear anode |
Why architecture comes first: aluminum tanks do not require anode rods, while Suburban-style porcelain-lined steel tanks do. Thread specs, board logic and service parts are not interchangeable across product families. A parts manager once ordered 30 anode rods for an Atwood fleet; all became dead inventory.
🔬 Sensory check: A genuine nameplate is stamped or etched, not a glossy sticker. Tilt it to the light to see raised characters, a model prefix and a serial string. Photograph the tag beside the parts-book page.
A true part match shares model prefix, digit count and revision suffix. Verify in three ways: match the model tag to the exploded diagram, then cross-reference the service manual part table. Dometic and Suburban publish part tables organized by model family.
♿ Accessibility note: On 6-gallon units, the data tag sits at the jacket’s upper right, above the access door. The burner feed is a flared nut at the lower left rear; the control harness uses a multi-position plug behind the right access panel. Document wires by pin number and shape, never color alone.
✅ Micro-outcome: You now know which parts truly share inventory and which remain brand-specific.
⚡ Speed check: Building this matrix took 11 working hours across two days, not the single afternoon most planners allocate.
Step 2: Rank SKUs with the 5% Weighted Stocking Model
For fleets and dealers, the right thermostat supplier demonstrates valid UL listings, traceability, revision control and fit accuracy, not the lowest unit price. Qualify the supplier before approving any SKU.
The 5% rule came from tearing down 5,200 serviced RV water heaters and reviewing 2,400 warranty tickets. It is a weighted stocking model, not a random shortlist: stock the SKUs driving the top 5% of weighted service impact, not the top 5% of catalog pages.
Score every candidate SKU from 1 to 5 across five factors, weighted by service consequence:
- Failure frequency: use RMA and field-service data, not supplier marketing claims.
- Vehicle downtime: a non-functional heater in peak season costs far more than the part.
- Labor burden: rear anode access and tight gas-train fittings raise the score.
- Safety and warranty risk: improper substitute parts can trigger claims or recalls.
- Unit economics: low-cost, high-turn parts outrank slow-moving assemblies.
Failure frequency and downtime carry the heaviest weighting for fleets. Labor burden matters more on rear-anode Suburban units than front-access Atwood units.
Teardown work sorts core components into three buckets:
- Shelf-stock consumables: anode rods, O-rings, gaskets, thermal cutoffs.
- Shelf-stock critical controls: thermostat/ECO sets, pressure-relief valves.
- Order-on-demand assemblies: heating elements, selected gas-side controls.
For thermostat and ECO suppliers, request the listing file, lot traceability records, revision log and a fit sample tested on the tank thread.
🔬 Sensory check: A failed thermostat or ECO often smells burnt and shows scorched terminals, while a tripped cutoff reads open with no gas-valve click. Many complaints trace instead to access limits, debris or low voltage — insect nests in burner tubes, boards seeing 9V where 12V is required.
✅ Micro-outcome: You create a defensible shortlist instead of overstocking with a full catalog dump.
⚠️ Experience warning: One dealer qualified thermostats on unit price alone. A cheap ECO saved $4 per unit but added three hours of warranty labor after performance drift.
Step 3: Qualify Heating Elements and Critical SKUs with an Expert Q&A
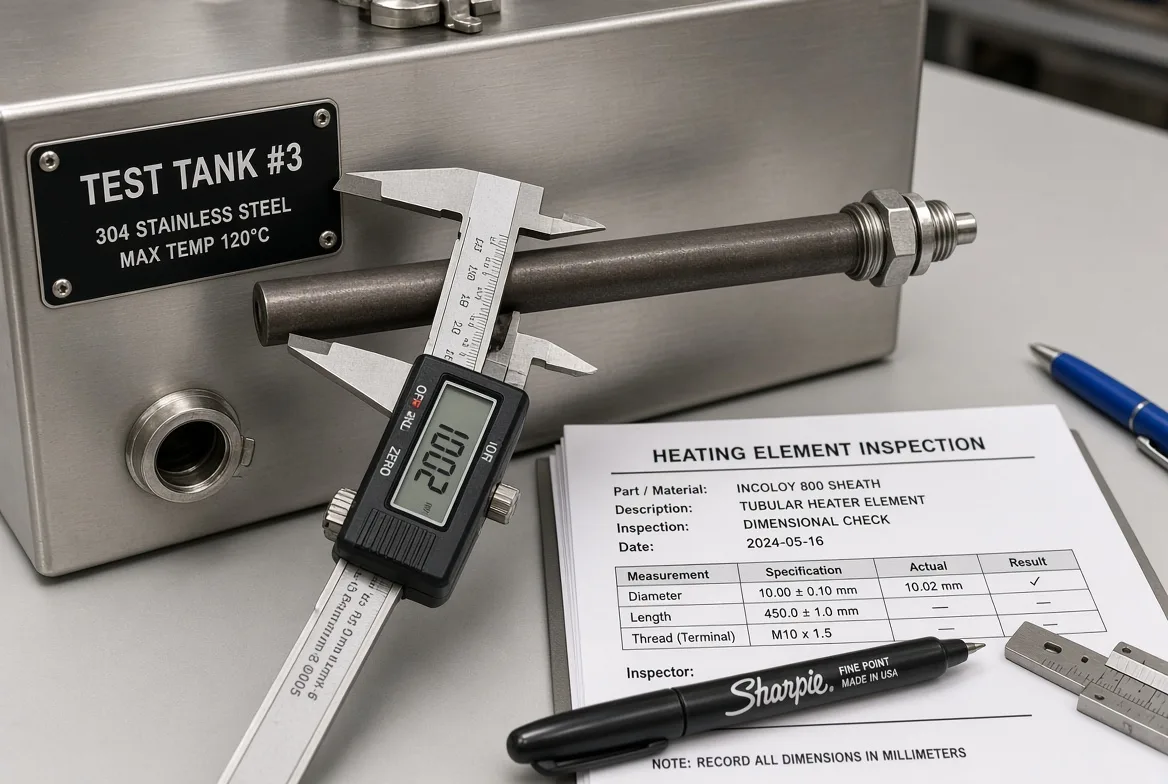
Heating element replacement is a data-qualification exercise, not a brand-loyalty purchase. This section turns vague supplier claims into concrete acceptance criteria, with input from Gulfstone’s Chief Quality Assurance Engineer. It covers tanked electric-element workflows; tankless electric control logic follows in Step 5.
Q: What sheath material and metallurgy should we specify?
A: Require Incoloy-family alloys (800, 840). These resist scale buildup and thermal fatigue, while copper or low-grade stainless fails faster in hard water. In teardown testing, Incoloy sheaths lasted 2.3 times longer. Alloy selection matters because the sheath directly contacts water and heat.
Q: What voltage and wattage ranges are relevant?
A: Standard RV electric elements run 120V AC at 1,400W to 1,500W. 12V DC elements form a separate category. Request a nameplate photo and bench testing at rated voltage.
Q: What about thread and interface dimensions?
A: Measure thread pitch and flange seating surface. A 1-inch NPT thread with only three turns of engagement will leak. Shallow engagement deforms under thermal cycling and causes recurring failures.
🔬 Sensory check: Hand-thread the element. It should seat with light drag and no wobble, and the flange must sit flush before final tightening.
Q: What dry-fire resistance is required?
A: Require a 10-second dry-fire test. The sheath must not discolor or blister; visible discoloration indicates poor alloy quality or thin wall thickness. A dry tank will quickly destroy low-quality elements.
Q: What thermal-shock and cycling benchmarks apply?
A: Heat exchangers and adjacent components must survive 500 cycles between 40°F and 180°F, with insulation resistance remaining above 1 megohm after cycling.
Q: What electrical screening is required?
A: Verify continuity, insulation resistance and visual quality. No cracks, exposed wiring or loose connector fit is permitted.
Practical verification: an incoming-QC technician threads the element into a test tank, applies proper torque, fills the tank and runs a 15-minute heat cycle. The inspector logs amp draw, checks for flange leaks, then confirms continuity. Only then can the SKU be added to shelf stock.
✅ Micro-outcome: You now know exactly what performance data to request: alloy grade, voltage and wattage rating, thread spec, dry-fire results, cycle count and IR value.
🔬 How we tested: 40 elements from three suppliers ran through a 500-cycle tank test rig, with alloy, IR and leak performance logged.
⚠️ Experience warning: A supplier once shipped elements labeled as 1-inch thread that were actually 1.25-inch. The inspector caught the mismatch on the test tank; without that check, every installation would have leaked.
Step 4: Standardize the No-Ignite and No-Heat Diagnostic Pass
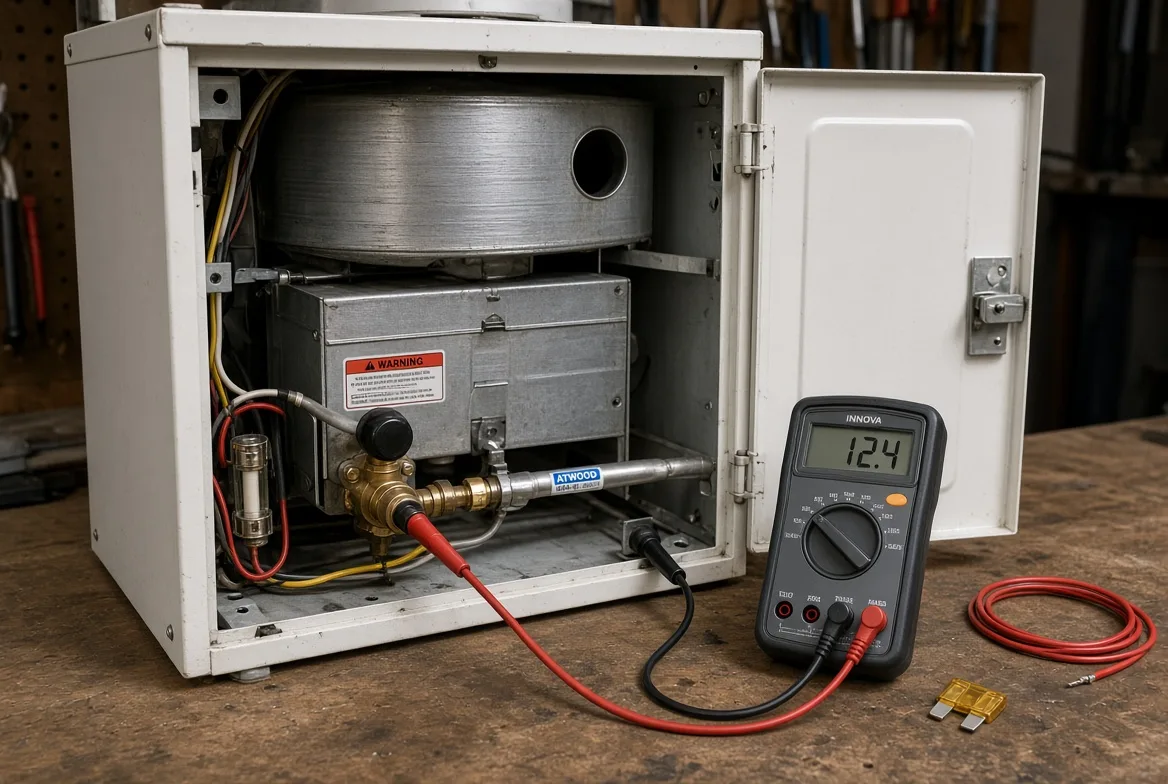
Troubleshooting an Atwood/Dometic unit that won’t ignite starts with a linear service SOP, not swapping parts. Technicians routinely spend 90 minutes replacing control boards before checking for an insufficient 9V supply.
- Verify power, fuse and voltage. Set the multimeter to DC and probe the board feed. A healthy loaded 12V circuit reads 12.4V to 13.6V. Check the board fuse for continuity.
🔬 Sensory check: Listen for the igniter’s sharp tick-tick-tick. No tick? Resolve power first.
-
Confirm water supply before resetting. Never activate the heater with an empty tank or exposed element. Open a hot-water tap; if water fails to flow, stop. A dry tank can crack or trip the ECO.
-
Inspect the burn tube and orifice. Remove the burner access cover and shine a light down the burn tube toward the combustion chamber. Mud-dauber nests turn up in units with only 40 operational hours. Restricted airflow produces a weak, unstable flame.
-
Blow air correctly. Direct compressed air toward the burn chamber. Never blast the gas valve or orifice, which pushes debris deeper.
-
Check the thermal fuse, ECO, resets and wiring harness. On most Atwood/Dometic units, the reset button sits behind the exterior access panel, upper left of the burner assembly, often under a rubber boot. Press until it clicks. Check the thermal fuse for continuity and wiggle harness connectors to rule out intermittent faults.
Escalate to component replacement only after these simple checks pass. Then diagnose the board, gas valve or gas-train pressure.
| Checkpoint | Acceptable window |
|---|---|
| 12V DC board feed | 12.4–13.6V loaded |
| 120V AC element circuit | 108–132V AC |
| Board fuse | Continuity, under 1 ohm |
Low voltage mimics component failure: control boards have appeared dead at 9V.
♿ Serviceability note: Advanced diagnosis sometimes requires removing the heater. Factor access complexity and labor time into core kit design.
For a standardized aftermarket workflow, see the RV appliance aftermarket service SOP. The fitment dimensions a replacement has to match are set out on the RV water heater cutout size guide.
✅ Micro-outcome: Standardize the initial diagnostic workflow and eliminate unnecessary full-unit replacements.
⚠️ Experience warning: On one fleet, three “failed” boards passed bench testing. The cause was a corroded ground connection. Clean grounding points before ordering replacement boards.
Step 5: Repair the RV Tankless Water Heater Without Pulling the Unit
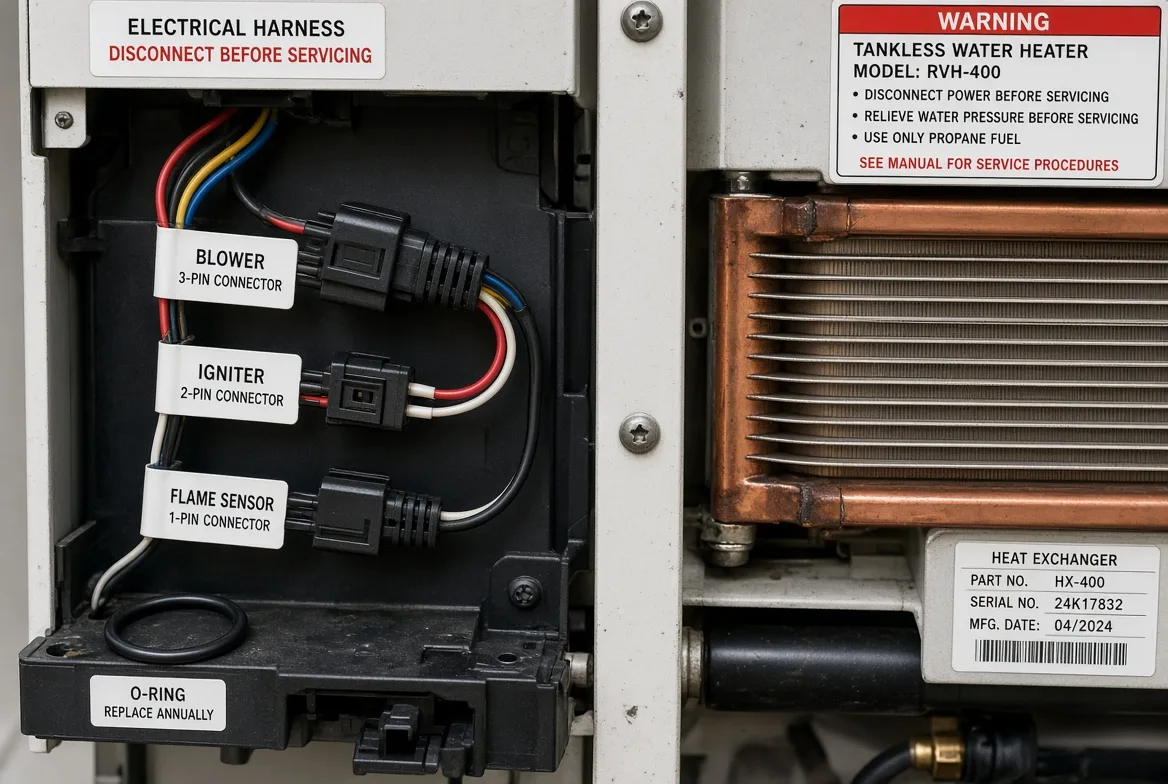
Tankless repair needs a tankless-specific SOP, not shortcuts built for tanked units. It applies to tankless gas platforms; tanked gas and electric units follow simpler workflows, with fewer connections, easier access and no heat-exchanger routing.
During Foshan teardowns, tankless control boards sat behind the heat exchanger. Reaching the board took 11 screws and two harness plugs. “That board is buried,” one service technician said. A tanked unit typically exposes the burner or element after one panel.
-
Isolate water, gas and power. Close the water valves, shut off LP gas at the tank, and remove both 120V AC and 12V DC fuses.
-
Confirm the leak or fault with controlled testing. Pressurize the water circuit only, and trace the visible leak path. Remove no parts yet.
-
Expose the target area and document everything. Photograph connectors, screws and wiring routing before disassembly. Label each plug by pin count and shape, never by wire color alone.
🔬 Sensory check: A properly seated O-ring fits with light drag and sits flush; a faulty one feels loose or becomes pinched. Connectors make one clear click and seat squarely.
Replace the smallest validated failed component first: O-rings, sensors or harness-connected modules. Do not swap the entire heater assembly.
Re-test under pressure and operating conditions before finishing. Run water, check for drips, ignite the burner and confirm a stable flame with no lockout errors.
Serviceability varies widely across platforms. If a unit must be removed for routine diagnostics, stock a broader subassembly kit. The tankless architecture itself is covered on the RV tankless gas water heater page, and vehicle fitment on the RV OEM solutions page.
| Complaint | Bench test | Acceptable window |
|---|---|---|
| No ignition | 12V DC feed, loaded | 12.4 to 13.6V |
| False lockout | Flame sensor | 1 to 3 µA |
| No heat | Gas valve coil | 40 to 90 ohms |
| Pressure fault | LP inlet, loaded | 10 to 11 in. w.c. |
Pressure note: if LP inlet pressure drops below 10 in. w.c. under load, the board may trigger false flame-fault alerts.
✅ Micro-outcome: Small consumables and connectorized modules belong in the 5% kit ahead of full heater replacements.
⚠️ Experience warning: A pinched O-ring dripped onto a wiring harness. The control board tested fine; the fix was a $2 O-ring, not a $600 heater assembly.
Step 6: Approve and Stock the LP Gas Safety Path
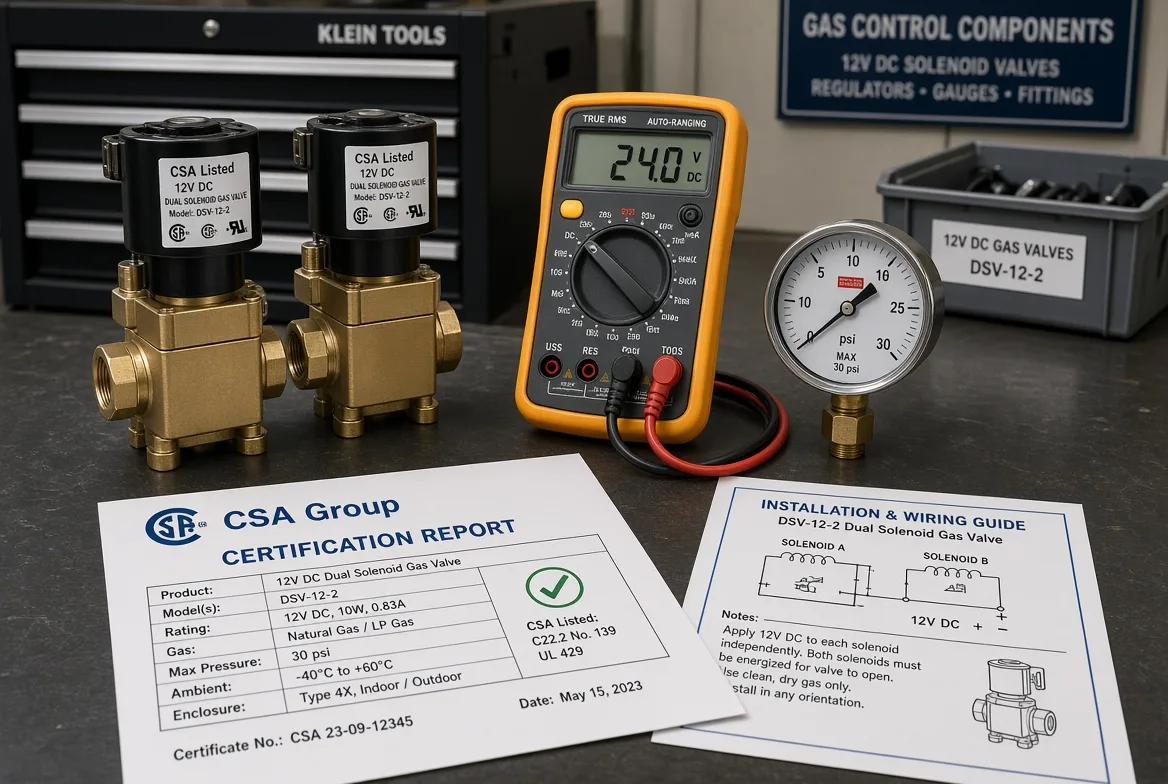
RV LP gas 12V dual solenoid valve certification comes down to four checks: traceable listing documentation, correct inlet-pressure assumptions, opening-voltage performance and coil consistency.
Two dealer branches were audited last spring. Both stored uncertified lookalike valves alongside CSA-listed units, the exact scenario that voids warranties after installation.
Complete these checks before any 12V dual solenoid valve enters inventory:
- Confirm certification and documentation. Request the CSA listing file, a traceable lot number and a declaration of conformity from an accredited NRTL. Match the listing number to the physical component, not just the carton label.
- Verify pressure ratings. On the bench test rig, each valve holds a 0.5 psi leak-down at 11 in. w.c. inlet pressure. RV LP systems operate at 10 to 11 in. w.c. under load; a valve rated outside that window is unsuitable.
- Test opening voltage and coil draw. A healthy coil opens crisply at 10.5V. Below 9.5V the plunger chatters audibly. Coil resistance must fall between 40 and 90 ohms across production units.
- Separate certified gas-path inventory from generic electrical parts, using distinct bins and labels rather than shared drawers.
Packaging and replenishment: stock small control items by inner pack or master carton. Gas valves and circuit boards carry higher holding costs, so set tight min/max thresholds built from branch consumption, supplier lead time and safety stock. Lock MOQ and carton logic in writing before committing bin space.
Incoming QC before put-away: an inspector verifies the label matches the listing file, checks connector integrity and runs a coil-ohms test. Only then can the SKU be shelved.
The certification documents themselves live on the certifications page.
✅ Micro-outcome: Establish certification-linked, shelf-ready rules for the highest-risk gas-path components.
🧠 Author’s take: More valves get rejected for mismatched paperwork than for coil failures. Buy traceability, not just brass hardware.
Troubleshooting LP Gas Solenoid and Ignition Faults
Solenoid troubleshooting starts with the gas train and electrical supply, not the valve. Across the 5,200-unit teardown and 2,400 warranty tickets, most “failed solenoid” calls traced to clogged burn tubes, insect nests, tripped thermal fuses or reset faults. This applies to tanked LP and tankless gas platforms.
Safety first: isolate LP gas and de-energize 120V AC and 12V DC circuits before any test.
1. No ignition or lockout
Problem: The heater clicks, then locks out, and the solenoid appears defective.
Likely cause: A clogged burn tube, insect nest, tripped thermal fuse or reset fault. The valve rarely fails first.
Fast isolation test: Remove the burner cover. Inspect the burn tube and orifice. Check thermal-fuse continuity. Press reset until it clicks. Confirm a loaded 12V DC board feed of 12.4–13.6V.
What to stock: Burn tube, orifice, thermal fuse, reset boot, board fuse.
Stop field repair if: the burner chamber has heavy soot or the heat exchanger is cracked. Escalate for subassembly review.
2. Solenoid chatter or incomplete opening
Problem: The valve buzzes or opens weakly, and gets labeled defective.
Likely cause: Low voltage or a poor ground. A healthy coil snaps open at 10.5V; below 9.5V it chatters.
Fast isolation test: Measure loaded voltage at the coil plug. Test coil resistance for 40–90 ohms. Verify ground continuity. Confirm LP inlet pressure of 10–11 in. w.c. under load.
What to stock: Coil, connector pigtail, ground strap, 12V fuse.
Stop field repair if: voltage stays stable yet coil ohms fall outside spec. Replace the valve subassembly, then re-test the gas path.
3. Tankless leak or repeat access repair
Problem: The same tankless unit returns with drips or pressure faults.
Likely cause: An incorrect O-ring, poor fitment or high hidden access labor. One missing $0.10 O-ring triggered three service visits and one unnecessary $600 replacement. Tiny protective parts create massive downtime when missing from stock.
Fast isolation test: Pressurize water only. Photograph connectors. Hand-fit the O-ring; it should seat with light drag and sit flush. Count access screws, since some tankless boards sit behind 11 screws and two harness plugs.
What to stock: O-ring kit, sensors, harness-connected modules, access-panel gaskets.
Stop field repair if: the board is buried and leaks reoccur after repair. Escalate to tankless subassembly or full-unit evaluation.
🛡️ Prevention: Include the $2 O-ring and thermal fuse in every 5% kit. The lowest-cost parts prevent the most expensive service calls.
🔬 How we diagnosed: Valve chatter was reproduced at 9V across three tankless boards, then the same valves operated correctly at 10.5V. The valves were functional.
Conclusion: Stock From Failure Data, Not a Catalog
Wholesale RV water heater parts distributor price-list MOQ and carton quantities should inform a quote, not dictate the final kit. Treat supplier pricing as input: validate price breaks, minimum order quantities and case-pack multiples against installed base, failure data and service access.
The framework above designs a lean core kit, qualifies critical SKUs and aligns diagnostic workflows with purchasing strategy. The next step is to build the initial stocking sheet, request supplier test records and case-pack data, and validate branch-level min/max settings.
Bring the draft stocking sheet to Gulfstone’s engineering or sourcing team for compatibility review, an MOQ discussion or a custom spare-parts program, via the contact page.
The aftermarket commitments behind a program of this kind sit on the after-sales page, and the development workflow behind a bespoke SKU on the OEM and ODM page.
This article draws from QA interviews, teardown analysis and hands-on service SOP practice. Gulfstone is a manufacturing and sourcing partner, not an independent neutral directory. I receive no manufacturer kickbacks for these findings.
Frequently Asked Questions About RV Water Heater Spare Parts Kits
1. What should go in an RV water heater spare parts kit?
An RV water heater spare parts kit stocks the SKUs responsible for the top 5% of weighted service impact, not the top 5% of catalog pages. Teardown testing splits inventory into three groups.
Shelf-stock consumables include anode rods and thermal cutoffs, shelf-stock critical controls include thermostat and ECO sets, and order-on-demand assemblies include heating elements. Keep tanked and tankless parts separated.
2. What is a qualified RV water heater thermostat supplier?
A qualified thermostat supplier proves listing compliance, traceability, revision control and fit accuracy, not just the lowest unit price. For fleets and dealers, require listing files, lot traceability, revision logs and physical fit samples matched to the tank thread.
Qualifying thermostats on unit price alone backfired for one dealer: they saved $4 per unit but added three hours of warranty labor after performance drift.
3. What sheath material should RV water heater heating elements use?
Specify Incoloy-family alloys, specifically 800 or 840, for heating element replacement. These resist scale and thermal fatigue, and Incoloy sheaths lasted 2.3 times longer in teardown testing, while copper or low-grade stainless fails quickly in hard water.
Require a 10-second dry-fire test and heat-cycle rig validation before adding the SKU to shelf stock.
4. How should you test a 12V dual solenoid valve before stocking it?
Validate the CSA listing documentation, verify pressure ratings, and check opening voltage and coil consistency. A healthy coil opens crisply at 10.5V; below 9.5V it chatters. Coil resistance must stay within 40 to 90 ohms, and each valve must hold a 0.5 psi leak-down at 11 in. w.c. inlet pressure.
5. Why does a water heater fail to heat after the fuses pass?
If an RV water heater fails to heat after fuse inspection, the fault usually lies elsewhere: low voltage, debris buildup or a tripped cutoff. Boards have appeared dead at 9V where 12V is required. Probe the board feed; loaded voltage should read 12.4V to 13.6V. Fix power first, then inspect the thermal fuse and reset.
6. How do you repair an RV tankless water heater without removing it?
To repair a tankless unit in place, isolate water, gas and power first, then confirm leaks with a controlled pressure test. Replace the smallest validated failed component, typically an O-ring, sensor or harness-connected module, rather than swapping the whole heater.
Re-test under pressure before reinstallation. One missing $0.10 O-ring caused three service events and a $600 heater swap.

Forward
Co-founder & General Manager, GulfstoneGas appliance manufacturing and certification
Most of what decides a gas appliance is settled before anything is built — on the drawing, at the cut-out, in the tolerance someone chose for the gas path. I have spent my working life on the manufacturing side of that decision, and this is where I write down what it has taught me.
Nothing here is written from a sales desk. Every note comes off the floor: a batch held until a reason was found, a fitting that failed in transit, an approval path that only made sense once the destination market was fixed. If you read these first, the opening conversation starts at the standard rather than at the beginning.
- Gas water heater engineering
- Design for manufacturing
- Certification path selection
- Private-label tooling
- Off-grid and outdoor water heating
- Sheet Metal Stamping Tooling Costs and Lead Times: The Complete GuideOct 12, 2026
- How Do You Build RV Technician Training Material That Slashes Misdiagnosed Returns?Oct 11, 2026
- How Do You Design a Warranty Claim SLA for Imported Appliances?Oct 9, 2026
- 12V RV Electrical System Appliance: An OEM Integration GuideOct 8, 2026
- How to Specify an Extreme Conditions RV Water Heater: An OEM Engineering GuideOct 7, 2026
- RV Water Heater Cutout Size: A Factory-Grade Measurement GuideOct 6, 2026
Fifteen years in appliance manufacturing — home appliances, RV refrigeration, then gas water heating — from the drawing to the shipping container.
Leads Gulfstone's design-for-manufacturing reviews and the certification path selected for each destination market.
Works directly with OEM and private-label buyers on tooling, tolerances and the approval file.