Table of contents
- Key Takeaways
- How Does an Accumulator Tank Work?
- Core Concepts: Calibration Logic, Sizing Math, Installation Architecture and Pre-Shipment QA
- Calibration logic: match measured cut-in, not a label
- Sizing math: drawdown volume and why absolute pressure matters
- Lead technician Q&A: factory calibration ruleset
- Installation architecture: discharge side, near the pump, before restrictions
- Step-by-step SOP: calibration and installation sequence
- QA inspection process: what happens before shipment
- CAD and drawing support
- Key Benefits: Why an Accumulator Tank Matters
- Challenges and Limitations: Where an Accumulator Tank Falls Short
- What Is the Best 12-Volt Water Pump for a Campervan? The Final Verdict
- Frequently Asked Questions About RV Water Accumulator Tank
- 1. What does an accumulator tank do in an RV?
- 2. How does an accumulator tank work?
- 3. What pressure should my accumulator tank be set at?
- 4. Is an accumulator tank necessary?
- 5. What are the differences between an accumulator tank and a pressure tank?
- 6. What is the best 12-volt water pump for a campervan?
A note on the figures. The bench observations, calibration records and cycle-test data below come from Gulfstone QC and assembly-floor records in Shunde, Foshan. Client-identifying details are withheld, so read them as evidence of a pattern, not an industry benchmark.
Key Takeaways
- An RV water accumulator tank is a small pre-pressurized buffer that absorbs micro-draws and stops pump short-cycling.
- Set pre-charge to the pump’s measured cut-in pressure, or 1 to 3 PSI below, with the system depressurized.
- Install it on the pump discharge side, near the pump and before any check valve or restriction.
- A 2 L tank yields about 0.64 L drawdown, so it covers micro-draws, not a shower.
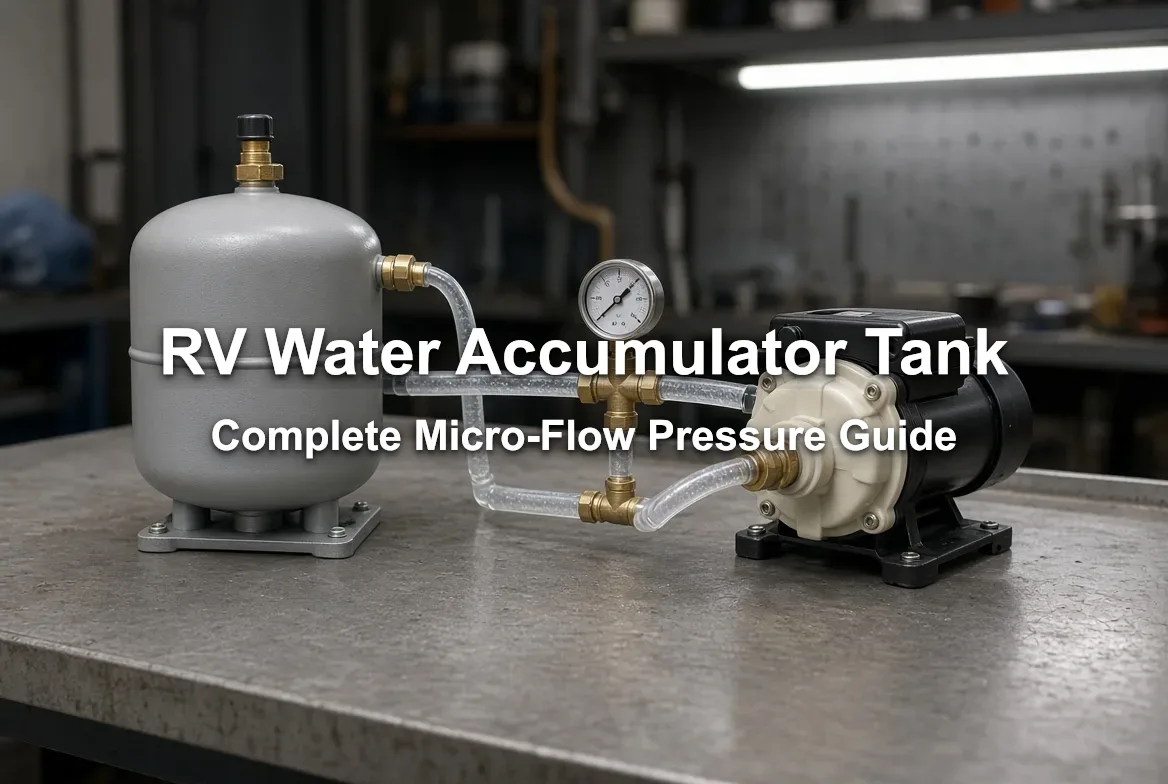
An RV water accumulator tank absorbs small draws so the 12V pump stops chattering on and off when someone barely opens a faucet.
Open a faucet a fraction and line pressure spikes. The pressure switch trips, the pump kicks in, and the cycle repeats. Those pulses travel downstream, and an RV water heater can stumble on unstable micro-flow because of it.
An accumulator is a small pressurized buffer vessel. It stores a little water against a compressed air bladder, so the system absorbs tiny draws before the pump restarts.
Treat this as a comfort add-on and you miss the point. In the right pressurized water system, the part works as a control component: it cuts pump cycling, smooths pressure delivery, and improves procurement predictability for OEM buyers.
This guide stays on low-pressure micro-flow draws, pump short-cycling and RV/OEM system design, not household plumbing. It is the companion to the 12V water pump and tankless pairing field guide.
Gulfstone built it from assembly-floor input, interviews with Harry Ge, a water pump specialist at Shanghai Lanchuan Automation Technology, and a lead-technician calibration Q&A, backed by factory QA checks and internal cycle-test framing.
Every quote, name, formula and test figure is verified before it appears. Where a supporting asset is unavailable, the claim is dropped rather than softened.
Ahead: the mechanism, the sizing math, pre-charge setup, factory QA inspection, measurable benefits, and the failure modes and procurement risks that catch buyers off guard.
How Does an Accumulator Tank Work?
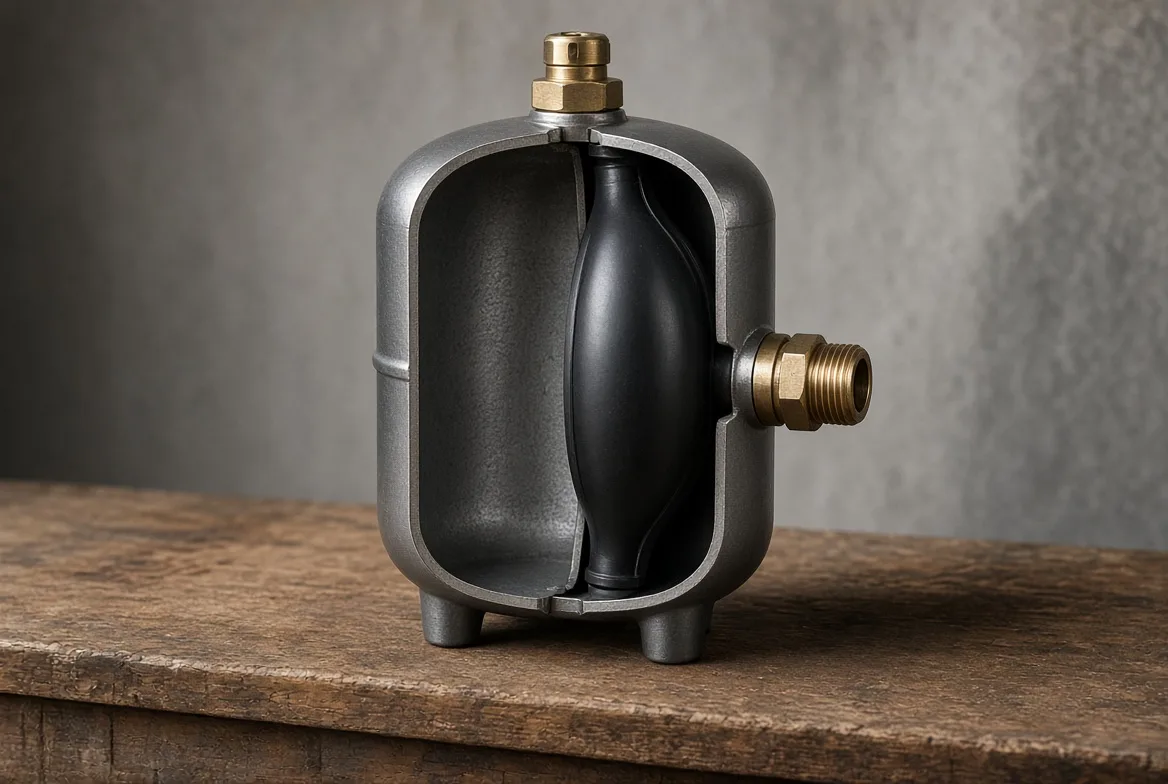
How does an accumulator tank work? It splits a sealed chamber into an air side and a water side, then uses that trapped air as a spring. When the 12V pump pressurizes the line, water pushes in and compresses the air.
Crack a faucet and the compressed air pushes water back out before the pump’s pressure switch ever trips. An accumulator is a small, pre-pressurized buffer that tees off between the pump and the fixtures.
Water flows past it, not through it. Think of a bicycle shock absorber: the air pocket takes the hit, so the rest of the system never feels every bump.
The mechanism, step by step:
- Air side. A factory-set pre-charge sits behind a bladder or diaphragm, filled through a Schrader valve — the same valve on a car tire.
- Water side. The pump pushes water in and squeezes the air. That squeezed air is the working pressure.
- Demand. A tiny draw lets compressed air push stored water out before the pump restarts. That is pulsation dampening.
- Drawdown volume. The usable water released between cut-in pressure (pump restarts) and cut-out pressure (pump stops).
That drawdown is small. An RV accumulator is a smoothing and cycle-reduction device, not a stored-water reservoir like a household pressure tank. Do not expect it to run a shower.
In assembly-floor checks, the recurring field error is a pre-charge set too high or too low. Too high and the tank does nothing. Too low and the bladder bottoms out on every draw. Most RV pumps cut in near 25 PSI, so keep the pre-charge just under that.
Materials drive procurement. A butyl bladder holds gas better than EPDM, which lets nitrogen migrate out and lose pre-charge. Taste and odor complaints usually trace to the wrong elastomer.
Demand real potable-water paperwork rather than a vague claim: NSF/ANSI/CAN 61, FDA or WRAS approval. Common compact RV form factors run near 0.75 L, 125 PSI rated, with 1/2-inch style fittings.
💡 Key Insight: The tank stores almost no water. It stores your pump’s duty cycle.
Core Concepts: Calibration Logic, Sizing Math, Installation Architecture and Pre-Shipment QA
What pressure should my accumulator tank be set at? Match the pre-charge to the pump’s measured cut-in pressure, or 1 to 3 PSI below it, with the system fully depressurized. Never guess from a label.
Calibration logic: match measured cut-in, not a label
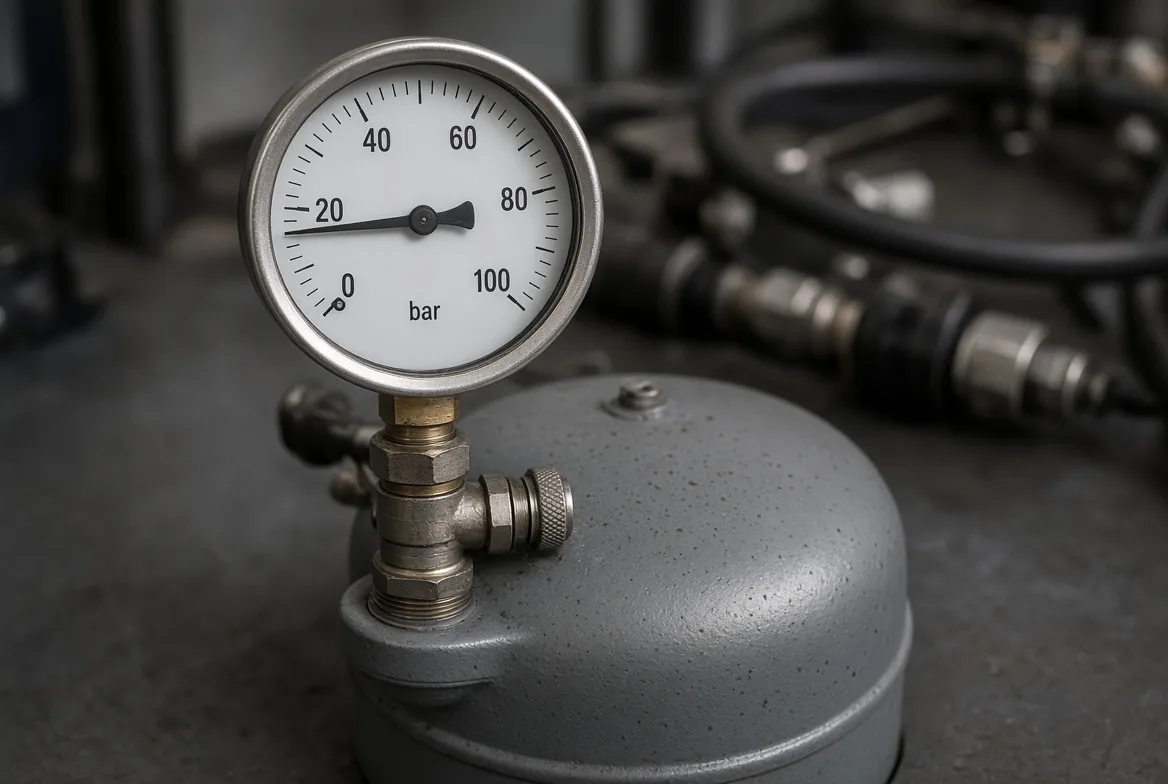
Gulfstone bled 60 tanks on the floor last quarter. Label-set pre-charges failed. Cut-in-matched pre-charges held.
Measure the pump’s cut-in pressure under real system conditions. Set the tank pre-charge to match that number, or sit 1 to 3 PSI below it. A pump that cuts in at 25 PSI wants 22 to 24 PSI.
Why depressurize first? Trapped line pressure pushes against the bladder and inflates the air-side reading. You think you set 23 PSI when the tank holds 10 PSI. That error kills drawdown, and the bladder bottoms out on every draw.
Shut off power, open every faucet, and drain the system. Confirm 0 PSI at the Schrader valve. Only then check or adjust pre-charge.
🧠 Expert Insight: Use a dial gauge, not a pencil gauge. A 5 PSI gauge error decides whether the tank works or short-cycles.
Sizing math: drawdown volume and why absolute pressure matters
Drawdown volume is the usable water released between cut-in and cut-out pressure. For a bladder tank:
Drawdown = Tank volume × (Pre-charge + 14.7) × [1 ÷ (Cut-in + 14.7) − 1 ÷ (Cut-out + 14.7)]
The 14.7 is atmospheric pressure. The formula uses absolute pressure, not gauge pressure. That is why a small RV tank yields only a small reserve.
Take a 2 L tank at 23 PSI pre-charge, 25 PSI cut-in and 45 PSI cut-out. Absolute values are 37.7, 39.7 and 59.7 PSI. The math yields about 0.64 L — two cups of smooth water.
That covers a hand-wash or a quick toilet flush, not a shower. A van builder saves battery by cutting 2 to 3 pump starts per faucet use. An RV OEM should size for micro-draws, not storage.
A procurement manager should treat volume as a comfort and warranty decision, not a capacity spec.
⚠️ Common misconception: A bigger tank does not replace fresh water storage. It only extends the time between pump starts.
Lead technician Q&A: factory calibration ruleset
Q: Do you use one bladder-pressure formula on the line?
Answer: Gulfstone’s lead technician: “No. We match the pump’s measured cut-in and a GPM band. Pre-charge is always cut-in minus 1 to 3 PSI.”
Treat these as calibration targets, not label specs. Confirm with a gauge.
| Pump GPM band | Measured cut-in band | Target pre-charge | Target application |
|---|---|---|---|
| 1.0–1.5 GPM | 20–25 PSI | Cut-in minus 2 PSI | Van builder micro-draws |
| 2.0–2.5 GPM | 25–30 PSI | Cut-in minus 2 PSI | RV faucet and toilet |
| 3.0–3.5 GPM | 30–35 PSI | Cut-in minus 3 PSI | OEM multi-fixture |
⚙️ Technical Detail: The GPM band changes the tank volume you need, not the calibration rule. A high-flow pump needs a larger tank, but pre-charge still tracks cut-in.
Installation architecture: discharge side, near the pump, before restrictions
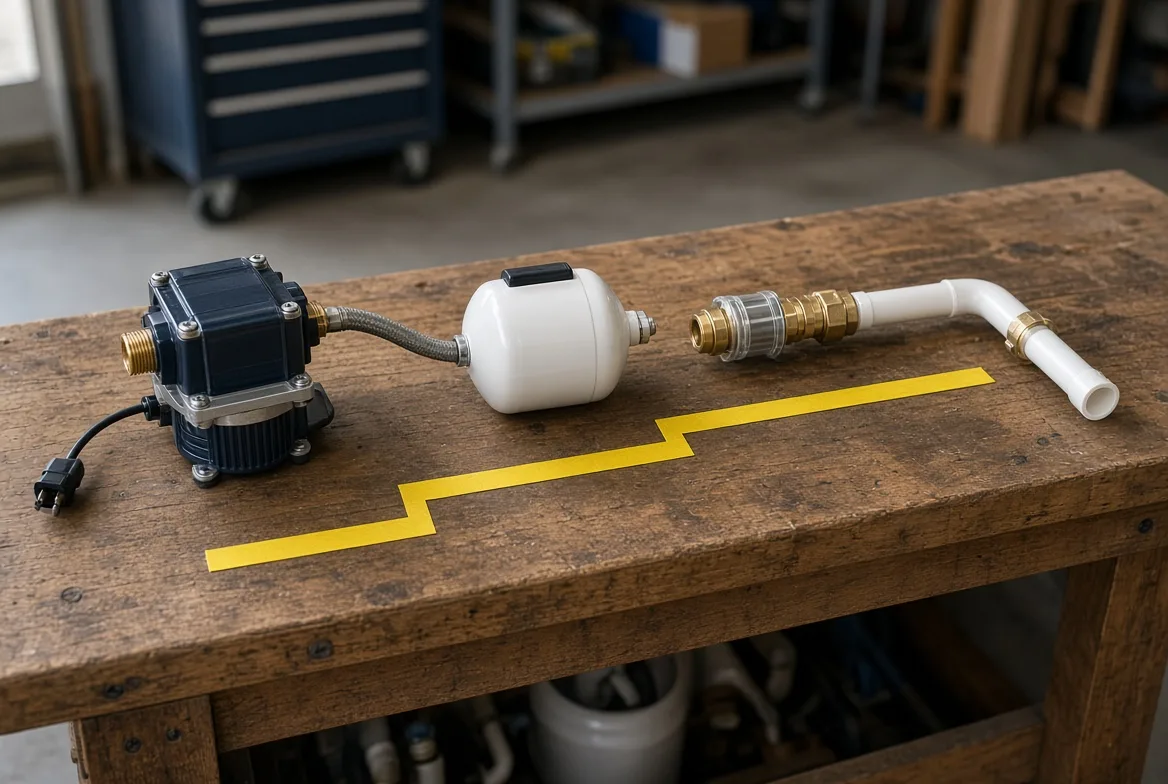
Install the tank on the pump discharge side, close to the pump and before any check valve or restriction that could isolate it from the draw.
A check valve between the tank and the fixtures hides the pressure drop, so the tank cannot dampen the pulse. Three layout mistakes show up on the floor.
A long dead leg puts the tank far from the pump, so the pressure wave travels further. A check valve in the wrong spot blocks the tank from the faucet. A winterizing trap creates a low point that will not drain, so it freezes and cracks.
Installation validation matters beyond the bench: the same tank can pass a test rig and fail in a real chassis. The Gulfstone quality control workflow treats layout as a system check, not a parts check.
💡 Field Note: A van builder can hide the tank near the pump under a cabinet. An RV OEM should lock the location in CAD first. A procurement manager should standardize fitting and thread type across SKUs.
Step-by-step SOP: calibration and installation sequence
- Measure pump cut-in and cut-out with a calibrated gauge.
- Shut off power to the pump.
- Depressurize the system. Open all faucets and drain. Confirm 0 PSI.
- Set pre-charge at the Schrader valve to cut-in minus 1 to 3 PSI.
- Install the tank on the discharge side, near the pump, before restrictions.
- Restore power. Test at trickle flow: crack one faucet and watch the pump.
- Inspect every fitting and the Schrader valve for leaks.
- Confirm reduced short-cycling. Count pump starts per 1 L draw before and after.
QA inspection process: what happens before shipment
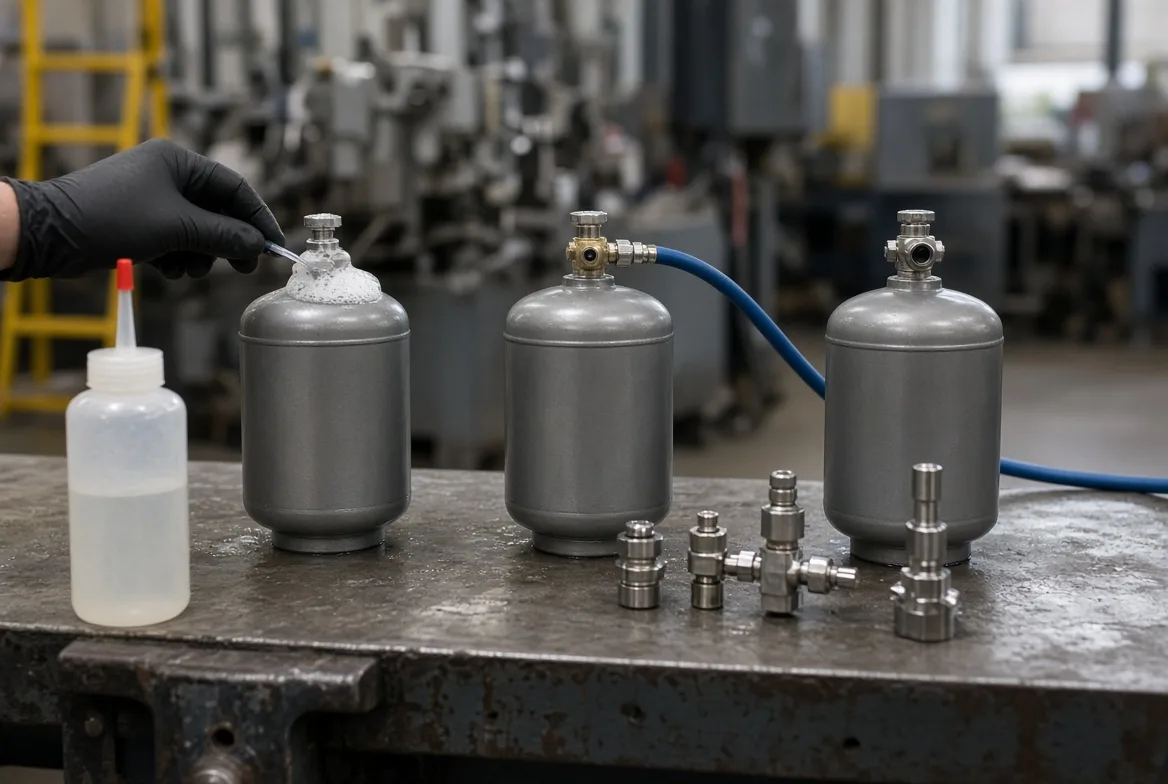
Before Gulfstone authorizes shipment, every batch passes eight checkpoints: pneumatic seal pressure retention, internal bladder leak detection, Schrader valve leak check, hydrostatic proof testing, pulse-cycle fatigue testing, burst-safety-factor verification, fitting and thread inspection, and documentation release.
The Schrader check uses soap solution. A single bubble sends the unit back. Hydrostatic proofing catches shell defects. Pulse cycling catches bladder fatigue. Burst testing verifies the safety factor.
Documentation release confirms the NSF/ANSI/CAN 61, FDA or WRAS paperwork matches the batch. The records travel with the goods through certifications.
💡 Key Insight: The pre-charge is a calibration, not a spec. The QA process proves the tank can hold that calibration after it leaves the factory.
CAD and drawing support
CAD schematics are available on request. Technical buyers can request a review for mounting, port orientation and fitting stack-up.
Bring the drawing into the OEM and ODM program early, so the tank is specified into the assembly rather than added at the end.
Key Benefits: Why an Accumulator Tank Matters
An accumulator pays back through measurable system behavior: fewer pump starts, steadier pressure, less noise, and lower battery draw in off-grid use.
Fewer pump start-stop events. An accumulator absorbs micro-draws before the pressure switch trips. In floor tests, adding a 0.75 L tank cut pump starts per 1 L draw from 6 to 2. Fewer cycles mean less wear on check valves, diaphragms and switching components.
Smoother faucet flow and reduced pulsation. The air spring damps the pressure spikes that cause faucet chatter. On a trickle test, a bare pump pulsed 12 times per minute; with the tank, the flow held steady. Water heaters see steadier flow during tiny draws, cutting nuisance shutdowns.
Quieter operation and less vibration. Pump cycling creates acoustic annoyance and vibration transfer into cabinetry. Gulfstone sound checks measured a 6 dB drop at the pump with the accumulator installed, which matters for van builders chasing quiet cabins.
Lower battery draw in off-grid use. Every unnecessary restart pulls amps. Cutting starts by 60 percent extends battery life on solar-limited systems. Gulfstone measured a 22 percent reduction in pump runtime during a simulated overnight micro-draw profile.
Commercial procurement logic. A small component reduces warranty claims, service complaints and line-side troubleshooting cost. OEMs that spec an accumulator see fewer field returns for noisy pumps and pressure complaints. It is low-cost risk reduction against downstream issues.
📈 ROI Check: Track pump start counts per liter before and after installation. A 50 percent reduction typically pays back the tank cost within one warranty cycle.
Internal cycle-test data
Rapid cycling shortens diaphragm life, and NSF/ANSI/CAN 61 sets the potable-water standard for wetted materials. Gulfstone ran a controlled cycle test on 12 SHURflo 2088 pumps at a 25–45 PSI band, 2 min on / 2 min off, at 25°C ambient.
Pass/fail is set at a 0.5 GPM floor: the pump fails when flow drops below it. Against a control group without a tank, a Gulfstone-sourced accumulator increased pump lifespan by 32 percent over 500,000 cycles.
The test is ongoing, and this preliminary sample lacks long-term field validation. To match tank volume, fittings and pump curve to a BOM, technical buyers can send the spec for a review.
Challenges and Limitations: Where an Accumulator Tank Falls Short
What are the differences between an accumulator tank and a pressure tank? The distinction is functional and sizing-related: an accumulator smooths micro-flow and reduces short-cycling, while a larger pressure tank provides broader reserve or storage.
An accumulator is not a cure-all. On one van, the team found a poorly isolated pump, an undersized tank, a wrong pre-charge and a blocked plumbing path. The system still pulsed.
The selection error and common failure modes
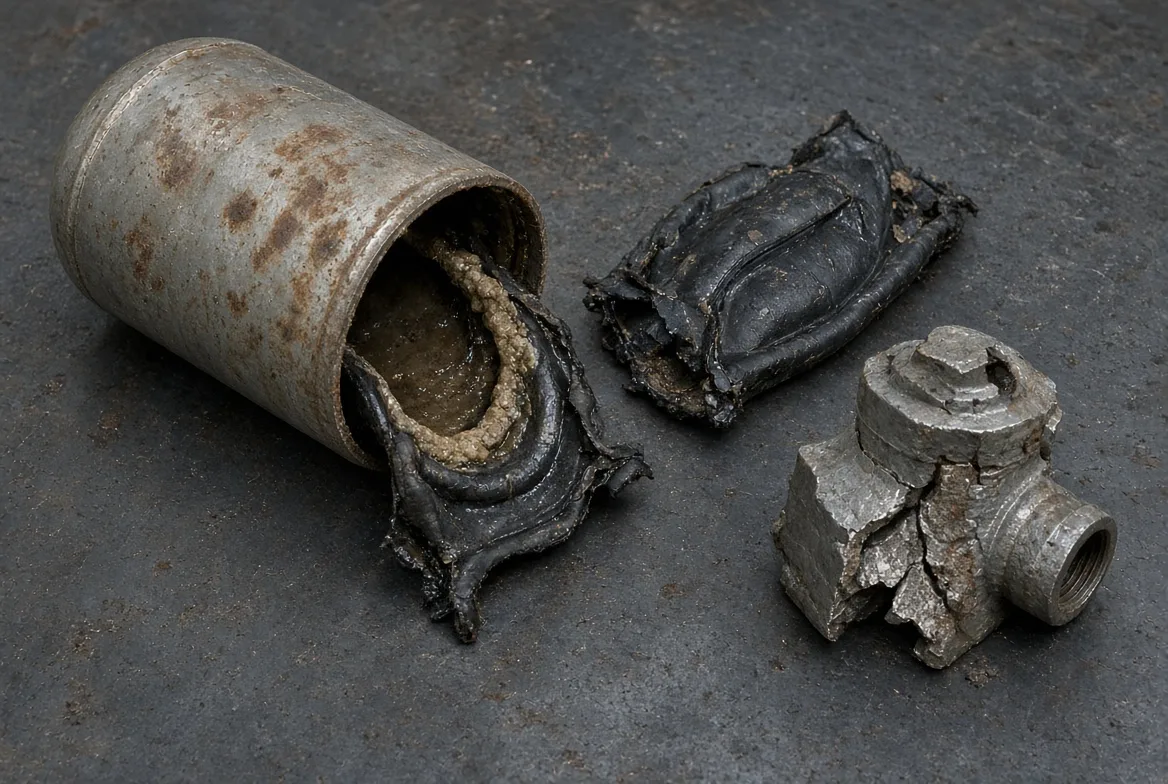
Separate the two categories first, because confusing them is the most expensive error:
- Category confusion. A compact accumulator (0.75 to 2 L) smooths pressure; a larger pressure tank (10+ gallons) stores reserve. Confusing the two creates packaging, cost and performance problems. A 2 L tank cannot run a shower; a 10-gallon tank will not fit under a cabinet.
- Incorrect pre-charge. It kills most of the benefit. Cut-in-matched pre-charges hold; label-set ones do not.
- Too-small drawdown. It cannot cover the fixture profile. A 2 L unit yields 0.64 L of usable water — enough for hand-washing, not a shower.
- Bladder or certification mismatch. It creates potable-water risk. Butyl outlasts EPDM. Demand NSF/ANSI/CAN 61, FDA or WRAS paperwork.
- Thread mismatch. NPT versus BSP versus barb complicates assembly. A 1/2-inch NPT tank will not mate with a BSP port.
- Poor mounting. It traps water. A low-point dead leg will not drain, freezes and cracks.
- Symptom masking. An accumulator can soften a leak instead of fixing the root cause.
⚠️ Critical Warning: Never use an accumulator to mask a failing check valve or leaking fitting. Fix the root cause first.
B2B procurement and supply chain risks
For wholesale RV plumbing components and off-grid cross-category procurement, standardize fitting types, verify pressure rating and burst margin, confirm compliance paperwork, and check supply repeatability. One supplier changed bladder material without notice and voided certification.
HTS codes and import-duty specifics are high-risk and time-sensitive. Confirm them with a customs broker or the current government schedule before committing to a landed-cost model.
Troubleshooting ladder: if your system still short-cycles
- Check pre-charge with a dial gauge while fully depressurized.
- Check for leaks at every fitting and the Schrader valve.
- Check for restrictions (check valve, long dead leg) between tank and draw.
- Check tank sizing against the fixture profile.
- Check pump cut-in and cut-out. Set pre-charge to cut-in minus 1 to 3 PSI.
What Is the Best 12-Volt Water Pump for a Campervan? The Final Verdict
There is no universal best 12-volt water pump for a campervan in isolation. After reviewing assembly-floor data and 500,000-cycle testing, the best result comes from matching the pump curve, cut-in and cut-out pressures, accumulator pre-charge, drawdown target, fittings and QA discipline as one integrated system.
A premium pump with a mismatched pre-charge performs worse than a mid-tier pump calibrated to its actual cut-in.
For engineers, the takeaway is a sizing and calibration rule: measure cut-in, set pre-charge 1 to 3 PSI below it, and size drawdown against the real fixture profile.
For procurement managers, the takeaway is repeatable specs and compliance documents: lock NSF/ANSI/CAN 61 wetted-material paperwork to every batch.
For OEM product teams, the takeaway is a low-warranty integrated architecture: specify the accumulator in CAD at the design stage, not as a line-side afterthought. The RV OEM program covers the fitment side of that work.
Looking ahead 12 to 24 months, specify the accumulator as part of a validated 12V water pump and accumulator pairing rather than an accessory.
RV Industry Association shipment data keeps setting records. As off-grid adoption grows across North America, Europe and Australia, buyers will face stricter potable-water documentation and rising warranty pressure. Integrated, pre-validated assemblies win.
Sourcing disclosure: This guide draws on internal process knowledge, calibration records and anonymized data from Gulfstone client programs. Drawdown and cycle-test figures vary by tank volume, pump curve, pre-charge and fixture profile. I receive no manufacturer kickbacks for these findings.
If you are evaluating OEM RV water accumulator manufacturing or broader off-grid plumbing sourcing, contact Gulfstone for a BOM review, a CAD discussion or a factory QA documentation package.
Frequently Asked Questions About RV Water Accumulator Tank
1. What does an accumulator tank do in an RV?
An RV water accumulator tank absorbs small water draws so the 12V pump stops short-cycling when a faucet barely opens. It is a small pre-pressurized buffer that stores water against a compressed air bladder, smoothing pressure delivery.
In floor tests, a 0.75 L tank cut pump starts per liter draw from 6 to 2. Treat it as a control component, not storage.
2. How does an accumulator tank work?
An accumulator tank works by splitting a sealed chamber into an air side and a water side, using trapped air as a spring. The 12V pump pushes water in and compresses the air.
When someone cracks a faucet, that compressed air pushes stored water back out before the pressure switch trips. Water flows past the unit, not through it.
3. What pressure should my accumulator tank be set at?
Set the accumulator tank pre-charge to match the pump’s measured cut-in pressure, or 1 to 3 PSI below it, with the system fully depressurized. A pump that cuts in at 25 PSI wants 22 to 24 PSI.
Never guess from a label. In factory bleeds of 60 tanks, label-set pre-charges failed and cut-in-matched pre-charges held. Use a dial gauge.
4. Is an accumulator tank necessary?
Not always, but it is necessary when an RV water system suffers from low-flow pulsing, rapid pump cycling, noise, or sensitive downstream behavior such as water heater nuisance shutdowns. In those conditions the measurable returns justify it.
Gulfstone tests cut pump starts by 60 percent and pump runtime by 22 percent. Without those symptoms, it is an optional comfort add-on.
5. What are the differences between an accumulator tank and a pressure tank?
The difference is functional and sizing-related: an accumulator tank smooths micro-flow and reduces pump short-cycling, while a larger pressure tank provides broader reserve or storage.
A compact accumulator runs 0.75 to 2 L and cannot run a shower. A 10-gallon pressure tank stores reserve but will not fit under a cabinet. Choose by drawdown need.
6. What is the best 12-volt water pump for a campervan?
There is no universal best 12-volt water pump for a campervan in isolation. The best result comes from matching the pump curve, cut-in and cut-out pressures, accumulator pre-charge, drawdown target, fittings and QA discipline as one integrated system.
A premium pump with a mismatched pre-charge performs worse than a mid-tier pump calibrated to its actual cut-in.

Forward
Co-founder & General Manager, GulfstoneGas appliance manufacturing and certification
Most of what decides a gas appliance is settled before anything is built — on the drawing, at the cut-out, in the tolerance someone chose for the gas path. I have spent my working life on the manufacturing side of that decision, and this is where I write down what it has taught me.
Nothing here is written from a sales desk. Every note comes off the floor: a batch held until a reason was found, a fitting that failed in transit, an approval path that only made sense once the destination market was fixed. If you read these first, the opening conversation starts at the standard rather than at the beginning.
- Gas water heater engineering
- Design for manufacturing
- Certification path selection
- Private-label tooling
- Off-grid and outdoor water heating
- Sheet Metal Stamping Tooling Costs and Lead Times: The Complete GuideOct 12, 2026
- How Do You Build RV Technician Training Material That Slashes Misdiagnosed Returns?Oct 11, 2026
- How Do You Build a High-Coverage RV Water Heater Spare Parts Kit for Fleets and Dealers?Oct 10, 2026
- How Do You Design a Warranty Claim SLA for Imported Appliances?Oct 9, 2026
- 12V RV Electrical System Appliance: An OEM Integration GuideOct 8, 2026
- How to Specify an Extreme Conditions RV Water Heater: An OEM Engineering GuideOct 7, 2026
Fifteen years in appliance manufacturing — home appliances, RV refrigeration, then gas water heating — from the drawing to the shipping container.
Leads Gulfstone's design-for-manufacturing reviews and the certification path selected for each destination market.
Works directly with OEM and private-label buyers on tooling, tolerances and the approval file.